Creating an Extrusion
Create a two-dimensional (2D) sketch, and extrude the sketch to form 3D geometry.
1. To specify the sketch plane, in the Model Tree, select the datum plane TOP.
2. On the Model tab, click  Extrude in the Shapes group. The Extrude and Sketch tabs open.
Extrude in the Shapes group. The Extrude and Sketch tabs open.3. To display sketch dimensions, on the in-graphics toolbar of the Sketch tab, click  Sketcher Display Filters, and select the
  Dimensions Display check box.
Sketcher Display Filters, and select the Dimensions Display check box.4. To sketch a circle:
a. On the Sketch tab, click  Center and Point in the Sketching group.
Center and Point in the Sketching group.b. To specify the center of the circle, click the pointer over the intersection of the dashed lines.
c. To specify the diameter of the circle, drag the pointer away from the center and click. It does not matter how far you drag the pointer.
d. To exit the sketch Center and Point tool, middle-click two times. The diameter dimension appears.
Center and Point tool, middle-click two times. The diameter dimension appears.5. To edit the circle diameter, double-click the diameter dimension, edit the value to 81, and press ENTER.
6. To complete the sketch, on the Sketch tab, click  OK. The Sketch tab closes.
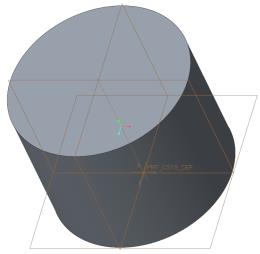
OK. The Sketch tab closes.7. On the Extrude tab, change the depth to 61.5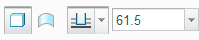 and press ENTER.
and press ENTER.8. On the Extrude tab, click  .
.
.9. To manipulate the orientation of the model in the graphics window, do the following:
◦ Hold the middle mouse button to rotate the model.
◦ Press SHIFT and hold the middle mouse button to pan the model.
◦ Press CTRL and hold the middle mouse button to zoom the model.