Cabin Radiation with Convection and Radiation: Exercise 1—Extracting the Fluid Domain
Fluid domain extraction is the creation of a closed geometric region that surrounds the fluid.
1. Click > and navigate to the Advanced_FlowAnalysisModels folder. Click OK.
2. Click >  Open.
Open.
Open.3. From the File Open dialog box, browse to the Cabin_radiation folder and select office_room.asm. Click Open.
4. Click  in the Graphics toolbar to display the style elements. Select Shading, or
  Shading with Edges.
in the Graphics toolbar to display the style elements. Select Shading, or Shading with Edges.5. Click the Applications tab.
6. Click  Flow Analysis. The Flow Analysis tab opens.
Flow Analysis. The Flow Analysis tab opens.7. Click  New Project. If the Residual plot opens, close it.
New Project. If the Residual plot opens, close it.8. Click  Create Fluid Domain. The Fluid Domain Creation tab opens.
Create Fluid Domain. The Fluid Domain Creation tab opens.9. Click the Seed surfaces tab.
10. Click the Faces box. The Surface Sets dialog box opens.
11. In the Surface Sets dialog box, under Included surfaces select all the surfaces, right-click, and select Remove All.
12. In the graphics window, press CTRL and select the internal surface shown in the following image. One surface appears in the Surface Sets dialog box, under Included surfaces.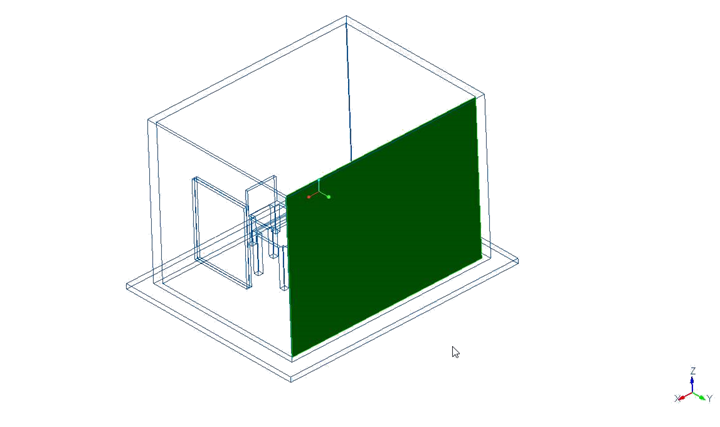
13. Click OK.
Adding the Simulation Domain
1. In the Fluid Domain Creation tab select Add to Simulation.
2. Click  to create the fluid domain. OFFICE_ROOM_1_FLUID.prt appears in the Model Tree and OFFICE_ROOM_1_FLUID is added under Domains.
to create the fluid domain. OFFICE_ROOM_1_FLUID.prt appears in the Model Tree and OFFICE_ROOM_1_FLUID is added under Domains.Adding Boundary Conditions
1. Under Domains, select OFFICE_ROOM_1_FLUID
2. In the Operations group, click Add Boundary Condition.
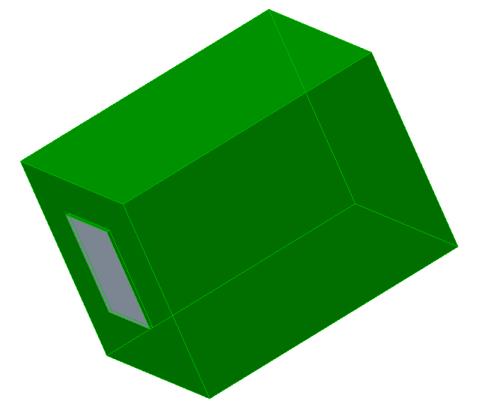
3. In the graphics window, press CTRL and select the nine surfaces shown below. These surfaces are the four side walls, the top wall, and the four outer sides of the window. One surface appears in the Surface Sets dialog box, under Included surfaces.
4. Click OK.
5. Right-click BC_00001 and select  Rename.
Rename.6. In the New name box, type Inner_Walls.
Selecting the Window Surface
1. Under Domains, select OFFICE_ROOM_1_FLUID
2. In the Operations group, click Add Boundary Condition.
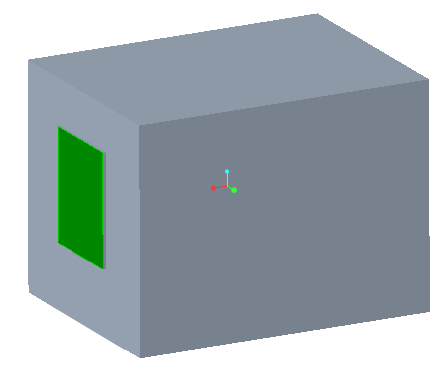
3. In the graphics window, press CTRL and select the surface shown below. One surface appears in the Surface Sets dialog box, under Included surfaces.
4. Click OK.
5. Right-click BC_00001 and select Rename.
Rename.6. In the New name box, type Window.