To Sculpt Geometry
1. Click >  Warp to open the Warp tab.
Warp to open the Warp tab.2. Select the geometry to sculpt.
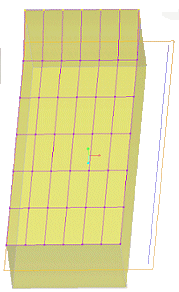
3. Click  Sculpt to display the sculpt settings and to display the sculpt marquee.
Sculpt to display the sculpt settings and to display the sculpt marquee.4. Click  Next Axis to switch the mesh orientation to the next marquee face.
Next Axis to switch the mesh orientation to the next marquee face.5. Click one of the following commands to specify how the geometry is sculpted through the marquee:
◦  One Side—Sculpt through the primary face of the geometry only. This is the default.
One Side—Sculpt through the primary face of the geometry only. This is the default.The damping limit specifies the depth at which changes in the primary face damp out to zero. Drag the faces of the marquee that are parallel to the sculpt axis to adjust the damping limit. For example, if the sculpt axis is in the direction of the x-axis, drag the top and the bottom faces of the marquee to adjust the damping limit. If the sculpt axis is in the direction of the y-axis, drag the front and the back faces of the marquee to adjust the damping limit.
Alternatively, click the Marquee tab and under Depth, specify the Start and End points for depth for the damping limit. Optionally, click  to export the parameter value to edit outside of Warp.
to export the parameter value to edit outside of Warp.◦  Both Sides—Sculpt the geometry with the motion of the primary face also applied to the opposite face.
Both Sides—Sculpt the geometry with the motion of the primary face also applied to the opposite face.◦  Symmetrical—Sculpt the geometry with symmetry on the opposite face.
Symmetrical—Sculpt the geometry with symmetry on the opposite face.6. If required, in the Rows and Columns boxes on the tab, specify a value from 2 to 20 to define the number of rows and columns of the sculpting mesh.
7. Click the Options tab and specify the values for Symmetry, Drag, and Filter for the group of points being sculpted as follows:
◦ Symmetry—Specifies the direction in which the group of points that you select moves when sculpted.
▪ None—No symmetry.
▪ Horizontal—Points move symmetric about the horizontal centerline of the face.
▪ Vertical—Points move symmetric about the vertical centerline of the face.
◦ Drag—Specifies the constraints on the group of points being sculpted.
▪ Normal—Points move along the normal of the selected face.
▪ Free—Points move freely.
▪ Along Row/Column—Points move along the rows or columns towards neighboring rows and columns.
◦ Filter—Specifies the behavior of the group of points being sculpted.
▪ Constant—Selected points move the same distance as the dragged point.
Example: Using Constant Filter
▪ Linear—Selected points drop off linearly with respect to the distance from the dragged point.
Example: Using Linear Filter
▪ Smooth—Selected points drop off smoothly with respect to distance from the dragged point.
Example: Using Smooth Filter
◦ Specify a value in the Scale box to displace the control points by the required value. For example, specify 2 in the Scale box to double the displacement of all the control points. The default displacement of all the control points in a marquee sculpt operation is considered to have a scale value of 1.
Optionally, click to export the parameter value to edit outside of Warp.
to export the parameter value to edit outside of Warp.8. To adjust the region of deformation, click the Marquee tab and specify the following options:
◦ References—Select optional references for the sculpt marquee.
◦ Rows, Columns—Type values for the Start and End points of the rows and columns to determine the size of the marquee. The range depends on the Marquee Size type that you selected.
Optionally, click to export the parameter value to edit outside of Warp.
to export the parameter value to edit outside of Warp.◦ Depth—The depth definitions determine the gradual effect of the sculpt operation as follows:
▪ Start—Type the proportion of the geometry the sculpt operation is applied to. For example, if you type 15, then the sculpt operation has a 100 percent effect on the first 15 percent of the geometry.
▪ End—Type the proportion of the geometry the sculpt operation is applied to. For example, if you type 85 the sculpt operation has no effect (0 percent effect) on the remaining 15 percent of the geometry.
◦ Marquee Size—Select a method of measurement to set the dimensions of the active axis.
Alternatively, drag the faces of the marquee. For example, if the direction of the sculpt axis is along the x-axis, drag the right and the left faces of the marquee to adjust the columns for the region for deformation and drag the front and the back faces of the marquee to adjust the rows for the region for deformation.
9. Select one or more control points. To select all the points in the row or column, hold down CTRL and click the mesh curves. Drag the selection set to modify the geometry.
If the boundary of the geometry is not aligned with the boundary of the default marquee, the boundary's control points cannot be moved. |
10. Select any warp operation to complete the current warp operation, or click  OK.
OK.
OK.