Example: Creating an Extended Surface Round
This example shows you how to create an extended surface round by extending the neighboring surfaces. First, we will attach the round type as a solid and examine the results. Next, we will attach the round type as a surface and cap the side and end surfaces to complete the round feature.
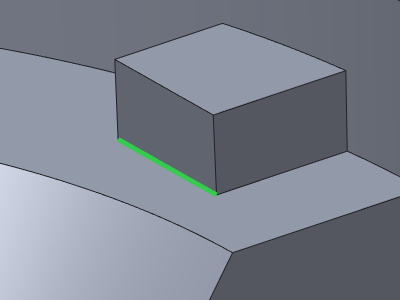
In this example, we will create a round on the highlighted edge as shown in the following figure:
Perform the following steps to create a space round on the selected edge.
1. Select the highlighted edge in the graphics window.
2. Click >  Round. The Round tab opens, and the selected edge is added in the References collector on the Sets tab.
Round. The Round tab opens, and the selected edge is added in the References collector on the Sets tab.3. Click  Extend Surfaces. Alternatively, in the graphics window, right-click near the selected edge and choose Extend Surfaces on the shortcut menu.
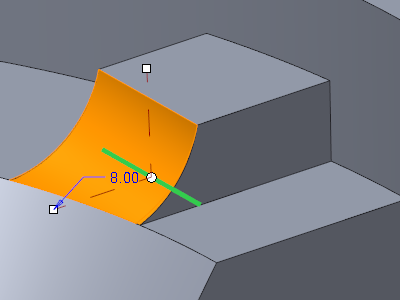
Extend Surfaces. Alternatively, in the graphics window, right-click near the selected edge and choose Extend Surfaces on the shortcut menu.4. Enter the radius for the selected edge on the Round tab or under Radius on the Sets tab. Alternatively, drag the handle in the graphics window to set the radius. The model appears as shown in the following figure:
5. Click the Options tab and ensure that the attachment type is set to Solid.
6. Click  . The Round tool is paused and the preview geometry of the round with the attachment type as solid is displayed as shown in the following figure:
. The Round tool is paused and the preview geometry of the round with the attachment type as solid is displayed as shown in the following figure: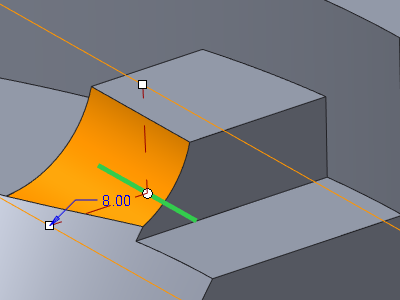
7. Click  to resume the Round tool.
to resume the Round tool.8. Click the Options tab and select both Surface and Create end surfaces under Attachment to create and attach the round as a surface.
Create end surfaces is available only if you select Surface. |
9. Click  OK. The round is created and attached to the model as shown in the following figure:
OK. The round is created and attached to the model as shown in the following figure: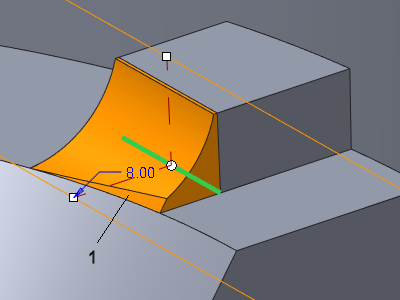
1. Surface extended and capped