Example: Creating a Constant-Angle Tangent Draft
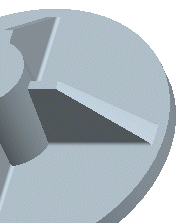
In this example, you have to add a 5-degree draft to a rib, which has 0.4" rounds at the bottom, as shown in the following illustration. To preserve the round at the bottom, you will add a constant-angle tangent draft (in this example, the feature is added in Part mode).
1. Activate the reference part.
2. Click > > . The Tangent Draft dialog box opens.
3. Click  . Note that the Direction default changes to One Sided.
. Note that the Direction default changes to One Sided.4. Specify the Pull Direction. Select the top surface of the housing. The system displays a red arrow pointing up. Click Flip to make the red arrow point down, because the Pull Direction must point from the reference curve in the direction of the tangent draft creation. Click Okay.
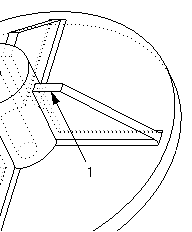
5. Click the References tab and select the top edge of the rib (1), as shown in the next illustration, then click Done.
6. In the Angle text box, type 5 and press ENTER.
7. In the Radius text box, type .4 and press ENTER (the radius value is the same as the radius at the bottom of the rib).
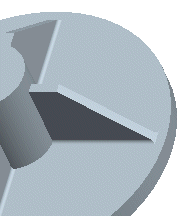
8. Click  . The feature geometry is shown in the following illustration.
. The feature geometry is shown in the following illustration.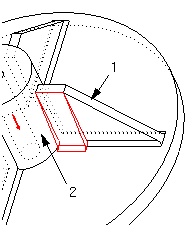
9. Click  . The constant-angle tangent draft is created.
. The constant-angle tangent draft is created.10. Repeat the procedure to create a constant-angle tangent draft on the other side of the rib. The completed feature is shown in the following illustration.