To Create a Follow Sketch Motion in Holemaking
You can sketch the traversal path between the holes’ axes by following the procedure below.
1. Choose Follow Sketch from the drop-down list in the Customize dialog box, and click Insert.
The Follow Sketch dialog box opens.
2. Edit the Tool Motion parameters, if desired, using the Feed, Spindle, and Coolant buttons in the top portion of the box.
3. Click the Sketch button to sketch the tool motion. The location of traversal path will depend on the following:
◦ If the At retract plane option button is selected, the traversal path will lie in the retract plane. If you later modify the retract plane height, the traversal path will update automatically.
◦ If the Specify Plane option button is selected, you will have to select a plane parallel to the XY plane of the NC Sequence coordinate system and enter offset from this plane in the indicated direction. The traversal path will lie in the offset plane.
As you start sketching, all selected holes are automatically marked by Sketcher points at the selected axes’ locations. The sketched path may contain as many entities as you want. If the sketched path passes through the Sketcher point that marks a selected axis, this hole will be drilled (you do not have to break the sketched entity at this point, or align it to the hole axis—the system will automatically make these assumptions). All entities included in the same sketch are parts of a single Tool Motion segment. A valid sketch must pass through at least one hole axis.
4. The Preview button allows you to preview the tool motion defined. Click OK if satisfied, Cancel—to quit creating the tool motion.
The following illustration shows sketching the traversal path.
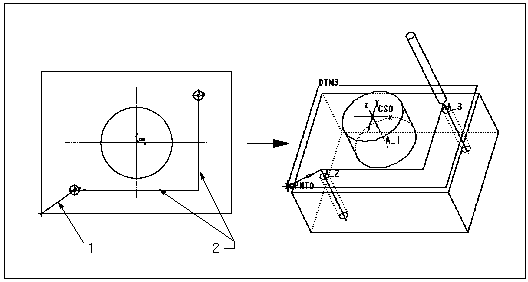
1. Previous path segment
2. Sketch