Exercise 3 – Creating Fasteners Without External References
The default setting of Creo Intelligent Fastener is to use external references for fastener placement. Depending on your company guidelines, you can change this setting and work without external references.
1. In Creo Parametric set the working directory to <downloaded files location>\IFXTraining\IFX_Asm\Exercise3 and open ifx-exercise-3.asm.
2. Click > >  Options. The Intelligent Fastener Options dialog box opens.
Options. The Intelligent Fastener Options dialog box opens.3. Set the value of the General option USE_EXTERNAL_REFERENCES to NO.
4. Click OK to confirm the change and close the dialog box.
5. Click >  Saved Orientations and then click GLASS.
Saved Orientations and then click GLASS.6. Click > >  Assemble on reference. The Select References dialog box opens and the Position Reference box is activated.
Assemble on reference. The Select References dialog box opens and the Position Reference box is activated.7. Select references as described in the list below:
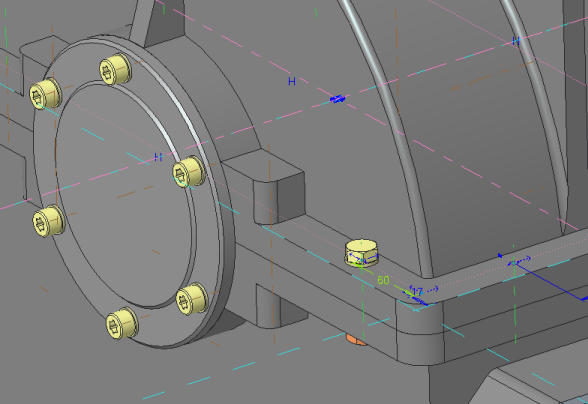
a. Select axis AA_2 as the Position Reference.
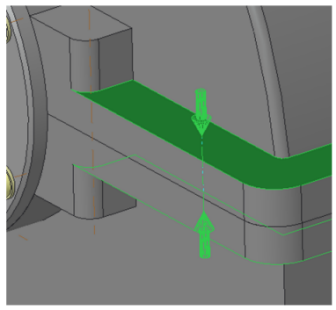
b. Select the placement surfaces for Screw head and Nut or Thread as shown in the figure below and then click OK. The Screw Fastener Definition dialog box opens.
8. In the Screw box, select ISO 4014-5.6.
9. In the Thread box, select M12.
10. Click  Permanently set length automatically.
Permanently set length automatically.11. Click OK to close the dialog box. The Additional Options dialog box opens.
12. Select > and click OK.
13. In the Model Tree, click Pattern 1 of AA_1 and select Edit Dimensions.
14. Change the value from 60 to 70 as shown and regenerate the part.
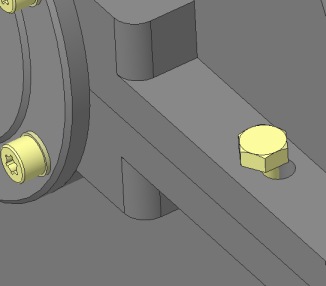
Due to the configuration change, the fasteners do not have external references. Therefore, the holes no longer align with the screws. |
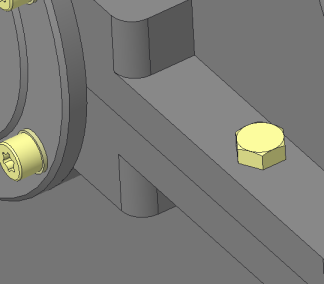
15. Click > > . The holes align with the fasteners as you can see in the image on the right.
Misaligned | Aligned | |
|---|---|---|
 |  |
16. Save and close the assembly.
17. Click > > . The Erase Not Displayed dialog box opens.
18. Click OK to erase all files from memory.