Exercise 1 – Assembling Fasteners with Orientation
1. In Creo Parametric set the working directory to <downloaded files location>\IFXTraining\IFX_Asm\Exercise1 and open ifx-exercise-1.asm.
2. Click >  Saved Orientations and then click TAPER.
Saved Orientations and then click TAPER.3. Click  Datum Display Filters and select the
  Axis Display check box.
Datum Display Filters and select the Axis Display check box.4. Click > >  Assemble on reference. The Select References dialog box opens and the Position Reference box is activated.
Assemble on reference. The Select References dialog box opens and the Position Reference box is activated.5. Refer to the diagram below and select the references as described in the list below:
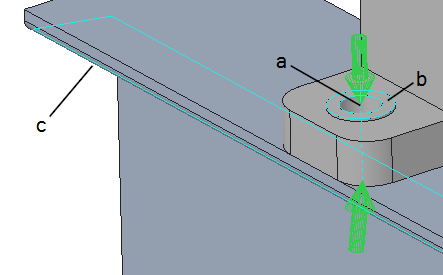
a. Select the hole axis as the Position Reference.
b. Select the top surface for the Screw head.
c. Select the lower surface of the I-beam for the Nut or Thread.
d. Click > Saved Orientations and then click RIGHT. The arrows are not aligned.
Saved Orientations and then click RIGHT. The arrows are not aligned.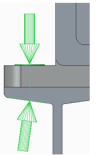
e. Click > Saved Orientations and then click TAPER.
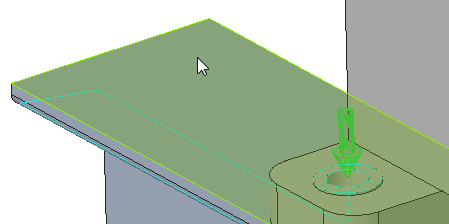
Saved Orientations and then click TAPER.f. In the Select References dialog box, click the Orientation box to activate it and then select the surface at the top of the I-beam, as shown in the diagram, to define the fastener orientation.
g. Click > Saved Orientations and then click RIGHT. The arrows are vertical.
Saved Orientations and then click RIGHT. The arrows are vertical.6. Click OK. The Screw Fastener Definition dialog box opens.
7. Click > Saved Orientations and then click TAPER.
Saved Orientations and then click TAPER.8. Click  Measure a diameter and select the axis hole surface.
Measure a diameter and select the axis hole surface.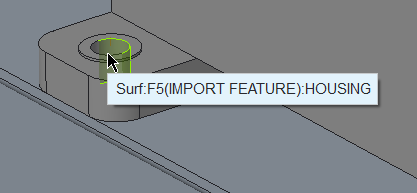
9. Select the Side 2 Washers check box and select DIN 435 I.
10. Click OK to complete the definition of the fastener and close the dialog box. The Additional Options dialog box opens.
11. Select > and click OK. The TAPER orientation is automatically rotated by 180° on the right side of the I-beam.
If you select > , the TAPER orientation incorrectly orients as shown below: 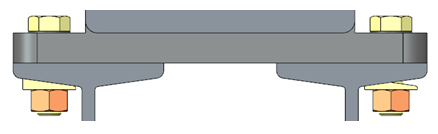 |
12. Save and close the assembly.
13. Click > > . The Erase Not Displayed dialog box opens.
14. Click OK to erase all files from memory.