Example: Creating a Basic Draft
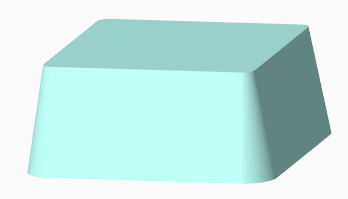
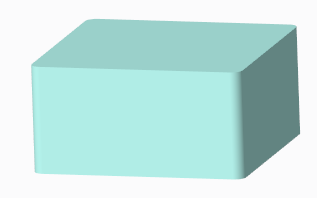
This example shows creating a basic Draft feature to add a draft angle of 10° to all sides of the part shown in the following illustration.
1. Click >  Draft.
Draft.2. Select any side surface. Because all the side surfaces are tangent to each other, the draft automatically extends to all the surfaces around the part.

3. Click the  Draft hinges collector on the Draft tab and select the top plane as the draft hinge. The system also automatically uses the plane to determine the pull direction, and displays the preview geometry, as shown in the next illustration.
Draft hinges collector on the Draft tab and select the top plane as the draft hinge. The system also automatically uses the plane to determine the pull direction, and displays the preview geometry, as shown in the next illustration.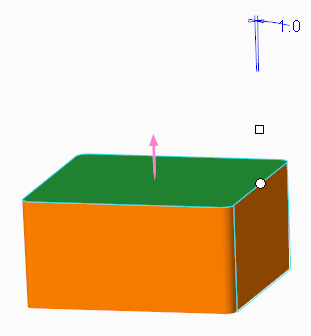
4. Type 10 in the  box on the Draft tab. The system updates the preview geometry, as shown in the following illustration.
box on the Draft tab. The system updates the preview geometry, as shown in the following illustration.
5. The draft removes material from the part surfaces. To flip the draft angle, click  Reverse angle to the right of the box to add or remove material. The draft now adds material, as shown in the next illustration.
Reverse angle to the right of the box to add or remove material. The draft now adds material, as shown in the next illustration.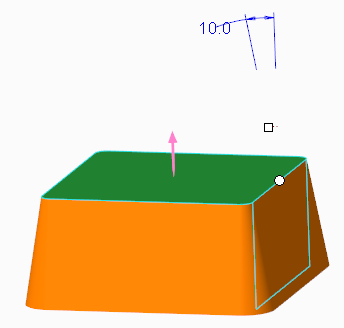
6. Click  to create the Draft feature. The final geometry is shown in the following illustration.
to create the Draft feature. The final geometry is shown in the following illustration.