To Fit an Image to a Value
1. Click > . The Images tab opens.
2. Select the image in the graphics window.
3. To set the ratio between the image height and width, select an option:
◦ To maintain the ratio between the height and width of the image, select  Lock Aspect Ratio.
 Lock Aspect Ratio.
◦ To adjust the height and width values independently of each other, deselect  Lock Aspect Ratio.
 Lock Aspect Ratio.
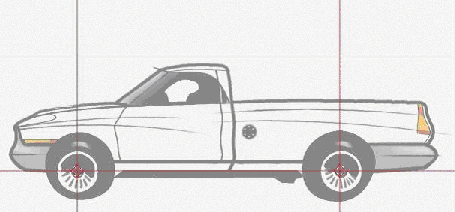
4. Click  Fit. Two sizing points, a line between the sizing points, and a value for the distance between the sizing points appear.
 Fit. Two sizing points, a line between the sizing points, and a value for the distance between the sizing points appear.
For the vertical and horizontal options, reference lines that pass through the sizing points perpendicular to the fit direction appear. |
5. To orient the sizing points, select an option:
◦ Free—Fits the image to a size between two points whose location you define.
◦ Horizontal—Fits the image to a size between two points that are aligned horizontally.
◦ Vertical—Fits the image to a size between two points that are aligned vertically.
6. Drag each sizing point to the desired location on the image.
For example, if you know the length of the wheelbase of a vehicle, place one of the sizing points on the center of the rear wheel and the other on the center of the front wheel.

7. On the line between the sizing points, double-click the value and type a new one. The image fits to the value.
8. To exit the Fit mode, click  Fit.
Fit.
 Fit.
Fit. Images