About Network Paths
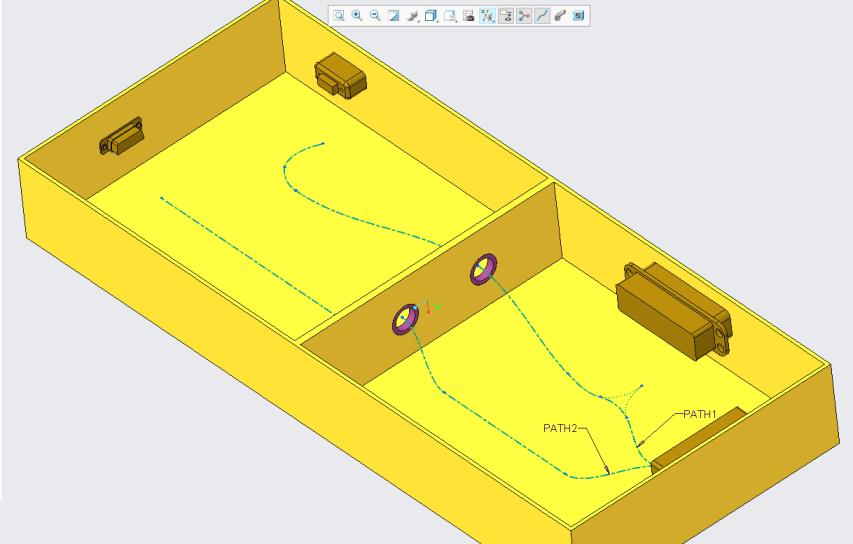
After you have defined a network, you can define paths within the network and associate specific cables or wires with them to further control the routing via a network. In the following figure, a part of the network has two defined paths.
When you define a path, you are prompted to name it. The name is attached to the path as a note.
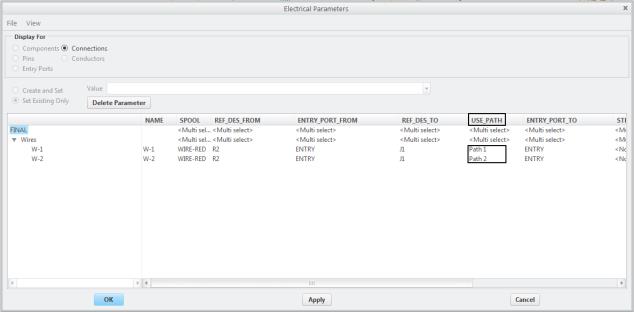
To associate a cable or wire with the path, attach the parameter USE_PATH to the cable or wire and specify the path name as its value. For example, the following image illustrates how to set the USE_PATH parameter for different cables.
If a path conflicts with other network location priorities, maximum diameter restrictions, or other automatic routing restrictions, the automatic routing of the wire fails. For example, if the specified path contains disallowed locations, automatic routing of the wire fails.
As a network path is similar to other cables, you can modify it so that some portion of the path may no longer be on the network. If both ends of a path are on the network, automatic routed cables follow the path, that is, they leave the network and then enter it. If only one end of a path is on the network, that path is ignored.
To Define and Edit Network Paths
1. Ensure that a network exists.
2. Click > > .
3. Select a start and end location to define the path.
4. Click OK. You are prompted to name the path.
5. At the prompt, type a name and press ENTER. The path is created and the name is attached to a note on the path.
To view the note on the path, ensure that annotations are set to display the notes. |
6. To extend or rename the path, click > > or > > .
To specify if a wire or cable must use a predefined network path, add a use_path <path_name> parameter and its value to that wire or cable.
To use a different name for the parameter, use the autoroute_path_param_name configuration option. |