Assembling a Solidworks Assembly
1. On the
Home tab, click
 New
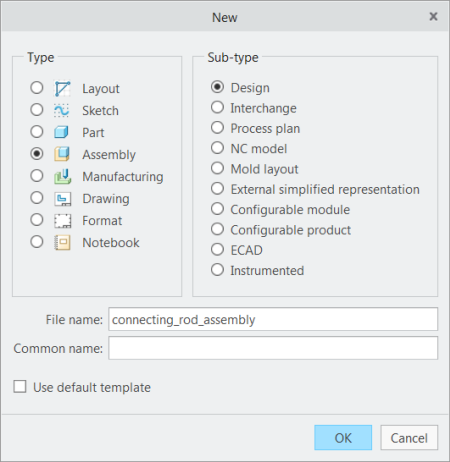
New. The
New dialog box opens.
a. Under Type click Assembly.
b. In the Name box, type connecting_rod_assembly.
c. Clear the Use default template check box.
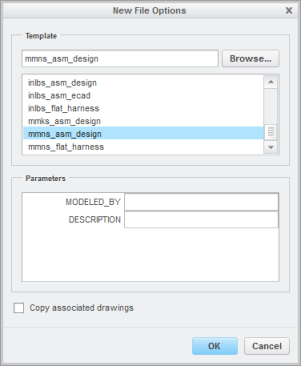
d. Click OK. The New File Options dialog box opens.
2. In the New File Options dialog box, do the following:
a. Under Template, select mmns_asm_design.
b. Click OK.
3. On the
Model tab, click
 Assemble
 from the
Component group. The
Open dialog box opens.
4. From the Type drop-down list, select SolidWorks Assembly (*.sldasm).
5. Select connecting_rod_assembly_sw.SLDASM and click Import. The Import New Model dialog box opens.
6. Click OK. The part opens in the graphics window and the Component Placement tab opens.
7. Right-click in the graphics window and click Default Constraint.
8. On the
Component Placement tab, click

.
9. On the Quick Access toolbar, click
 Save
Save and then click
 Close
Close.
 New. The New dialog box opens.
 New. The New dialog box opens.
 New. The New dialog box opens.

 Assemble from the Component group. The Open dialog box opens.
 .
.
 Save and then click
  Close.