Mirroring Extrudes
1. In the Model Tree, right-click Sketch 1, and click
 Hide
Hide.
2. On the
Model tab, click
 Extrude
 from the
Shapes group. The
Extrude tab opens.
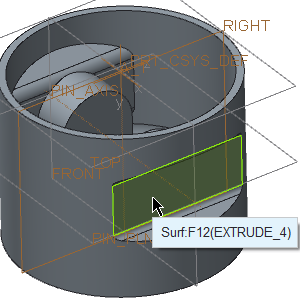
3. Select the surface as shown in the following figure. The Sketch tab opens.
4. Right-click in the graphics window and click References. The References dialog box opens.
5. In the Model Tree, select the datum planes PIN_PLN and FRONT. The datum plane names appear in the box.
6. Click Close.
7. On the in-graphics toolbar, click

Sketch View.
8. Click
 Center and Point
 from the
Sketching group.
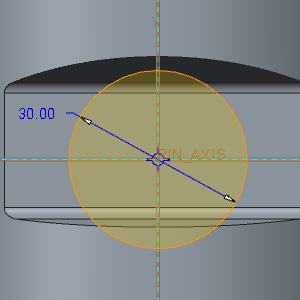
a. Click at the intersection of the reference planes to define the center of the circle.
b. Move the pointer away and click again to specify the diameter.
9. Middle-click to exit the
 Center and Point
 tool.
10. Double-click the diameter dimension, edit the value to 30, and press ENTER.
11. Right-click in the graphics window and click
 Save the sketch and exit
.
12. On the
Extrude tab, edit the value of the depth to
1.5, and click

.
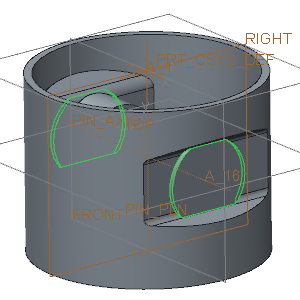
13. With the Extrude 7 still selected, click
 Mirror
 from the
Editing group. The
Mirror tab opens.
14. In the Model Tree, select the datum plane RIGHT and click

.
15. On the in-graphics toolbar, click

Saved Orientations, and click
Default Orientation.


 Hide.
Hide. Extrude from the Shapes group. The Extrude tab opens.
 Sketch View.
 Center and Point from the Sketching group.
 Center and Point tool.
 Save the sketch and exit.
 .
. Mirror from the Editing group. The Mirror tab opens.
 .
.
 Saved Orientations, and click Default Orientation.