Trim Ply Boundary by Contour
1. Select a ply to trim.
2. Click >  Trim Ply. The Trim/Extend Ply tab opens. The boundary of the laminate object is highlighted in the graphics window.
Trim Ply. The Trim/Extend Ply tab opens. The boundary of the laminate object is highlighted in the graphics window.3. Under Method, select  By Contour if not selected by default.
By Contour if not selected by default.4. In the Boundary chains collector, select chains to define a trimmed boundary of the ply. You can define the boundary by selecting a single closed loop, one outer and one or more inner loops, multiple individual loops, or multiple intersecting curves, edges, or loops. Make sure that each loop intersects the ply boundary.
5. To invert the selection, use Flip Side. The highlighted area defines a new boundary for the ply.
6. Click  OK.
OK.
OK.Examples—Trim by Contour
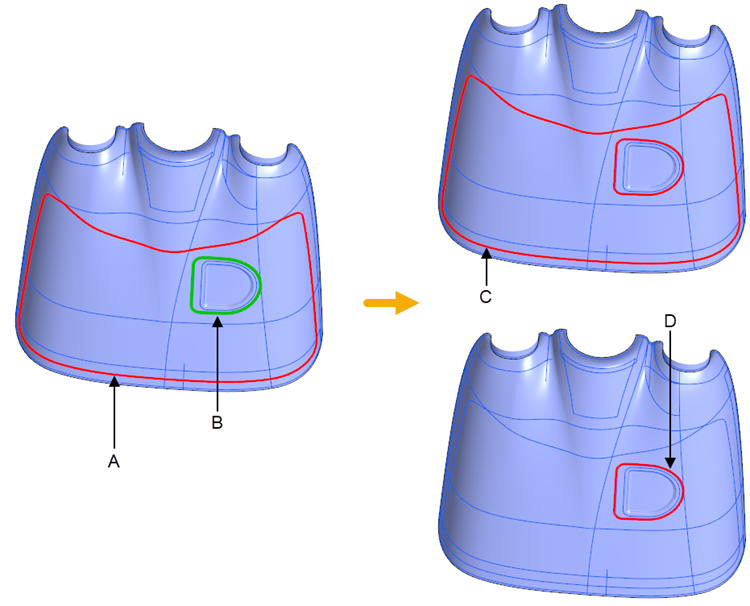
Some examples of valid trimming are as follows:
• The trimming contour is a closed chain that intersects the ply boundary.
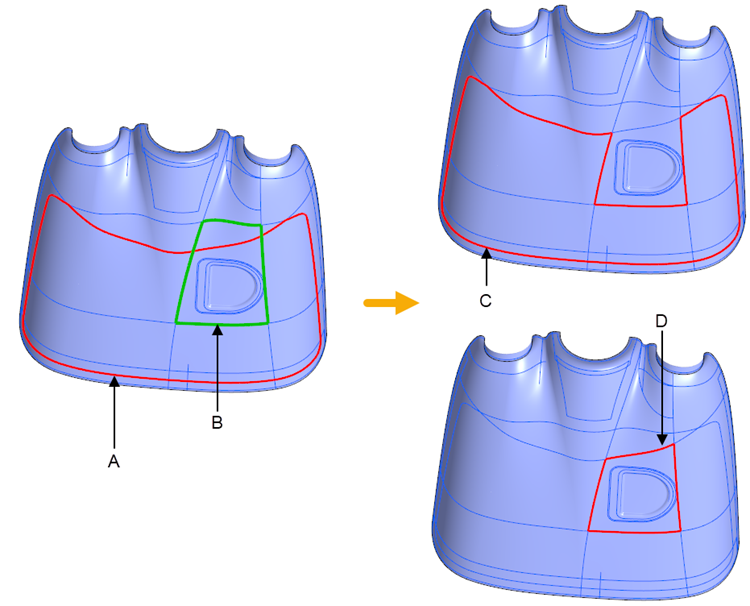
◦ A—Original ply boundary
◦ B—Trimming contour
◦ C—New ply boundary without applying Flip Side
◦ D—New ply boundary after applying Flip Side
• The trimming contour is between the outer and inner loops of the ply boundary.