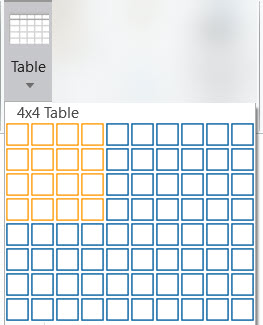
To Create a Table Using the Table Grid
1. Open a model.
2. On the Annotate tab, click  Table. The table grid opens.
 Table. The table grid opens.
3. Hover the mouse over the grid to select a table size in number of rows and columns. The selected columns and rows appear highlighted on the table grid. The table size appears on the top of the table grid.

4. Select the lower-right highlighted cell to insert the table.
5. Move the pointer and then select the location of your table in the graphics window. Left-click to place the table.
6. Click outside the table to exit the selection mode.
When you select a table in MBD, a contextual Format ribbon tab and a Table ribbon tab open. Use the icons on these tabs to customize the table and its contents according to your requirements.