Create Manual Plies (PLY_4 and PLY_5)
Create a Copy of PLY_2 and PLY_3
1. In the Composite Tree, select the Manual Ply 2 feature.
2. Press Ctrl and select the Manual Ply 3 feature. Both, the Manual Ply 2 and Manual Ply 3 features, are selected.
3. Press Ctrl + C.
4. Press Ctrl + Shift + V. The Paste Special dialog box opens.
5. Select the Advanced reference configuration check box.
6. Click OK. The Advanced Reference Configuration dialog box opens.
7. Click  . The Advanced Reference Configuration dialog box closes.
. The Advanced Reference Configuration dialog box closes.The laminate objects PLY_4 and PLY_5 are added to the Laminate Tree.
The manual ply features Manual Ply 4 and Manual Ply 5 are added to the Composite Tree.
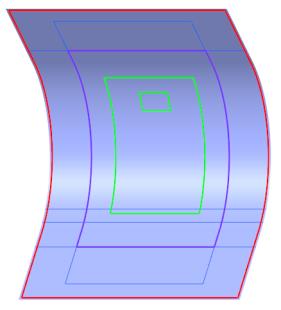
8. Click in the empty space in the graphics window. The boundary of PLY_4 and PLY_5 are highlighted, as shown in the following graphic:
Change Ply Properties using Shortcut Menu
1. Press Ctrl and select PLY_4 and PLY_5 in the Laminate Tree.
2. Right-click and select Properties. The Laminate Objects Properties dialog box opens.
3. In the Material box, select XE800_36.
4. Click OK. The materials of the selected plies change.
5. Click in the empty space in the graphics window.
6. To see the changed material, click  Laminate Manager. The new material of PLY_4 and PLY_5 is XE800_36.
Laminate Manager. The new material of PLY_4 and PLY_5 is XE800_36.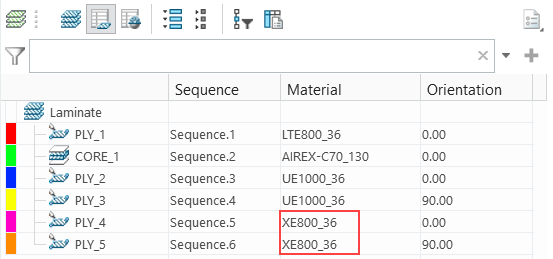
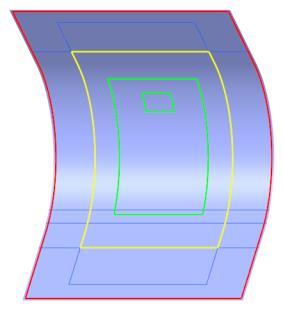
7. On the Laminate Tree, click  Laminate List.
Laminate List.8. Click in the empty space in the graphics window. The model appears, as shown in the following graphic:
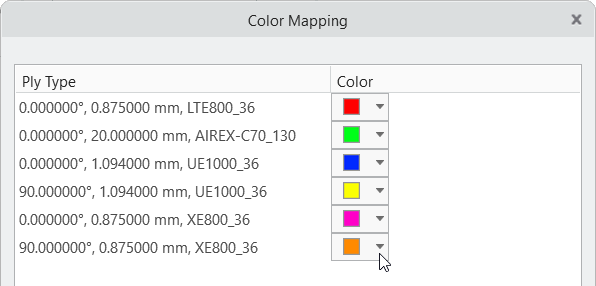
Change the Color Mapping
1. Click > . The Color Mapping dialog box opens.
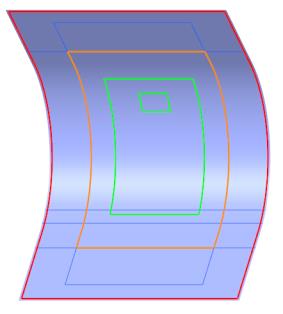
2. Change the color of plies with the material XE800_36 and orientation 90 degrees as follows:
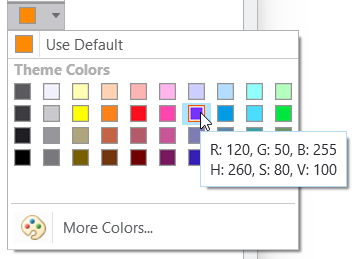
a. Click the arrow next to the color R: 255, G: 138, B: 0. The color palette opens.
b. Select the color R: 120, G: 50, B: 255, as shown in the following graphic:
3. Click OK. The Color Mapping dialog box closes. The model appears, as shown in the following graphic: