Create a Manual Ply (PLY_3)
Create a Copy of PLY_2
1. In the Laminate Tree, right-click PLY_2 and select  from the shortcut menu. The Manual Ply 2 feature is highlighted in the Composite Tree.
from the shortcut menu. The Manual Ply 2 feature is highlighted in the Composite Tree.2. Press Ctrl + C.
3. Press Ctrl + Shift + V. The Paste Special dialog box opens.
4. Select the Advanced reference configuration check box.
5. Click OK. The Advanced Reference Configuration dialog box opens.
6. Click  .
.
.The laminate object PLY_3 is added to the Laminate Tree.
The manual ply feature Manual Ply 3 is added to the Composite Tree.
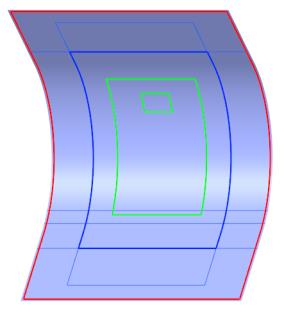
7. Click in the empty space in the graphics window. The boundary of PLY_3 is highlighted, as shown in the following graphic:
Change Ply Properties using Laminate Manager
1. On the Laminate Tree, click  Laminate Manager. The properties of the laminate objects are displayed.
Laminate Manager. The properties of the laminate objects are displayed.2. Change the orientation of PLY_3 as follows:
a. Click the cell that shows the orientation of PLY_3. The cell becomes editable.
b. Type or select 90.00 from the list, and press Enter.
3. On the Quick Access Toolbar, click  Regenerate. The manual ply PLY_3 is updated, as shown in the following graphic:
Regenerate. The manual ply PLY_3 is updated, as shown in the following graphic: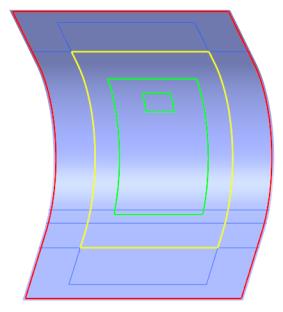
4. Click  Laminate List.
Laminate List.