To Insert an Auxiliary View
An auxiliary view is a type of projection view that projects at right angles to a selected surface or axis. The direction of the selected surface determines the projection channel. The reference in the parent view must be perpendicular to the plane of the screen.
1. Open a drawing.
2. Click > . Alternatively, right-click and click Insert Auxiliary View on the shortcut menu. The Select dialog box opens.
3. Select an edge, axis, datum plane, or surface to create the auxiliary view from. A box appears over the parent view, representing the auxiliary view.
4. Drag the box horizontally or vertically to the desired location. Left-click to place the view. The auxiliary view is displayed.
• The value that you have specified for the make_aux_view_notes configuration option determines whether or not to automatically display the auxiliary view name when you create a view. • The value that you have specified for the aux_view_name_format Detail option determines the name of the auxiliary view. • The value that you have specified for the default_view_label_placement Detail option determines the location of the view note. • To modify the properties of the auxiliary view, access the Drawing View dialog box by double-clicking the projection view or right-clicking the view and clicking Properties on the shortcut menu. You can define other attributes of the drawing view by using the categories on the Drawing View dialog box. When you are done defining each category, click Apply and select the next appropriate category. When you have completely defined the drawing view, click OK. |
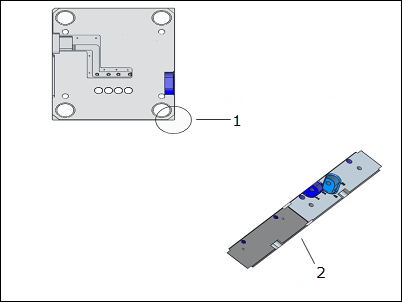
Example

1. Auxiliary View Projected from the corner.
2. AUXILIARY VIEW
 Auxiliary