About Displaying Intersection Witness Lines
You can display intersection witness lines for dimensions that have intersection type references. If you have used Pro/ENGINEER Wildfire 4.0 release to create dimensions that reference entity intersections, set the witness_line_intersection Detail option to yes to display intersection witness lines. For existing dimensions that reference entity intersections, to display the intersection witness lines, click the Display button on the Dimension ribbon tab. In the Display panel, select the Enable Intersection witness lines check box.
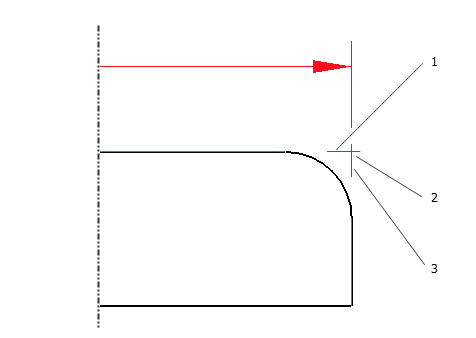
The intersection witness lines appear as shown in the following figure:

1. First intersection witness line
2. Intersection reference
3. Second intersection witness line
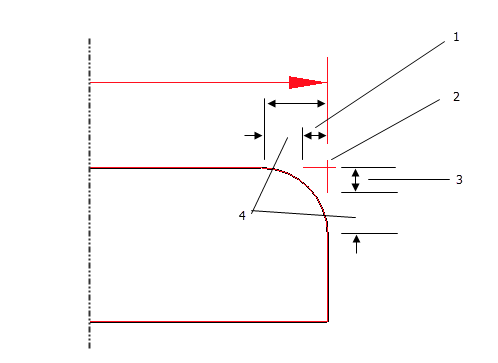
Individual intersection witness lines appear for each witness line of the dimension that has an “intersection” type reference. The default length of an intersection witness line is the distance between the end of the intersection entity and the intersection minus the value of the witness_line_offset Detail option as shown in the following figure:

1. Length of the first intersection witness line
2. Extended intersection witness line
3. Length of the second intersection witness line
4. Witness line offset
The intersection witness lines and the intersection points share a parametric relationship.
The intersection witness lines are extended beyond the intersection point. The length of the extended witness lines is eight times the line thickness. |
To display intersection witness lines for an intersection reference, the following conditions must be satisfied:
• The two intersecting entities must be straight entities.
• One of the entities must be extended to obtain the intersection. Therefore, if an intersection reference lies on any one of the two intersecting entities, intersection witness lines are not created for that intersection reference.