Cross Section Views
You can create and save a cross section in Part or Assembly mode and show it in a drawing. When inserting a view, you can add a cross section to the view.
When creating a cross section, you can define it using one of the following two basic methods:
• Following a selected datum plane or planar surface. This is a planar cross section.
• Drawing a path offset from a reference plane through a solid. This is an offset cross section.
When inserting views, you can set each view type to use one of the cross section techniques described in the sections that follow.
Total and Area Cross Sections
• A total cross section displays the cross-sectioned area and the edges of the model that become visible when a cross section is made.
• An area cross section displays only the cross section without the geometry.
To learn how to add total cross section and area cross section to a drawing view, go to Exercise—Adding Total and Area Cross Sections.
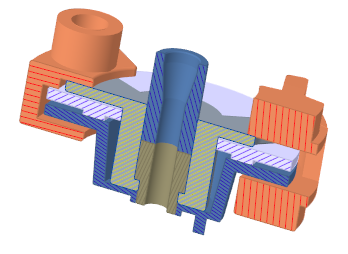 Cross Section in Assembly Mode |
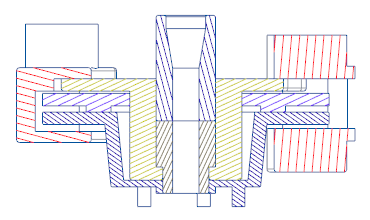 Total Cross Section in Drawing Mode |
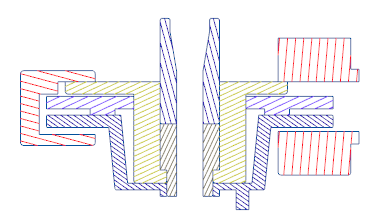 Area Cross Section in Drawing Mode |
For planar area cross-sectional views, set the Detail option draw_cosms_in_area_xsec to yes to show all cosmetic sketches and datum curve features that lie in the cutting plane.
Full, Half, and Local Cross Sections
• A full cross section displays the cross section across the whole view.
• A half cross section displays a cross section of the model only on one side of a selected plane.
• A local cross section uses a breakout to see through an outer surface to a portion of an inner cross section.
To learn how to add full cross section, half cross section, and local cross section to a drawing view, go to Exercise—Adding Full, Half, and Local Cross Sections.
 Cross Section in Assembly Mode |
 Full Cross Section in Drawing Mode |
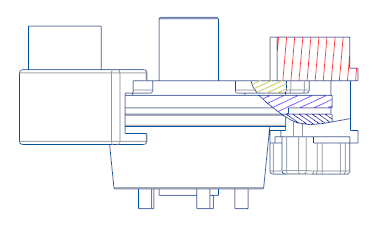 Local Cross Section in Drawing Mode |
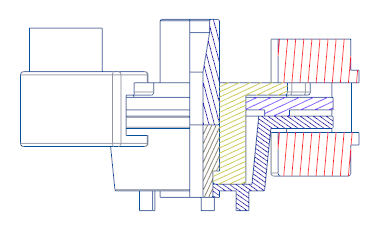 Half Cross Section in Drawing Mode |
Multiple Cross Sections
You can also have multiple cross sections in one view.
To learn how to add full cross section and local cross section to the same drawing view, go to Exercise—Adding Multiple Cross Sections.
|
Drawing View with a Full Cross Section and a Local Cross Section Applied Within the Drawing View
|
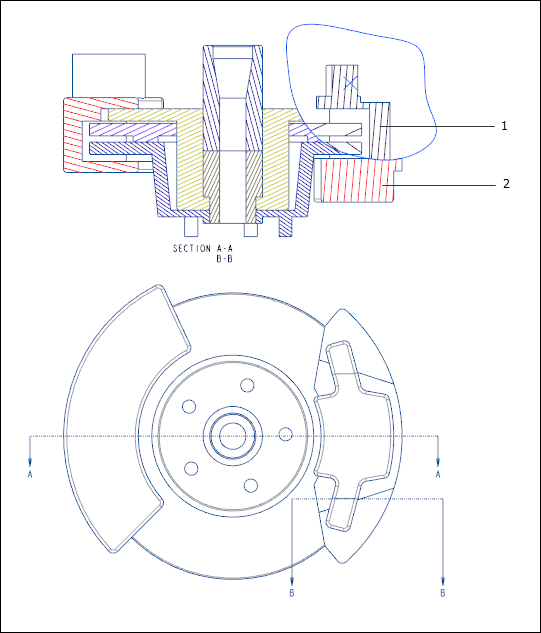 1. Local cross section 2. Full cross section |
|
|
In the image above, the spline appearing around the local cross section is an intermediate state. The spline does not appear in the final result.
|
Revolved Cross Section
A revolved view is a cross section of an existing view that is revolved 90 degrees around a cutting plane projection. You can use a cross section created in the 3D model as the cutting plane, or you can create one on the fly while placing the view. The revolved view differs from a cross-section view in that it includes a line noting the axis of revolution for the view.
To learn how to add revolved cross sections to a drawing view, go to Exercise—Adding Revolved Cross Sections.
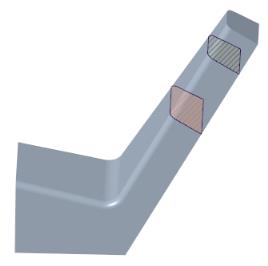 Cross Section in Part Mode |
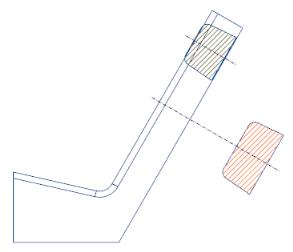 Revolved View Showing Multiple Sections of the Same Profile |
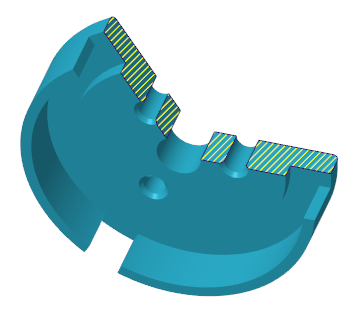
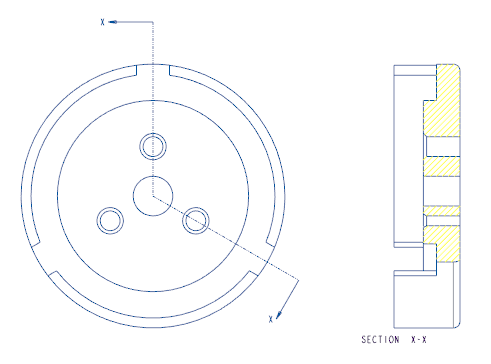
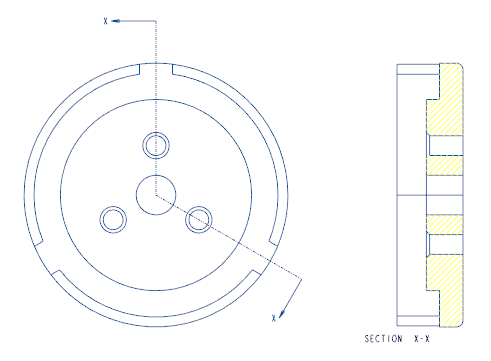
Full Aligned Cross Section
A full aligned cross section displays a cross-sectional view that is unfolded around an axis.
To learn how to add full aligned cross section to a drawing view, go to Exercise—Adding a Full Aligned Cross Section.
|
Cross Section X in Part Mode
|
 |
|
Full Cross Section in Drawing Mode
|
 |
|
Full Aligned Cross Section in Drawing Mode
|
 |
Full Unfold Cross Section
A full unfold cross section shows a flattened cross section of a general view.
To learn how to add full unfold cross section to a drawing view, go to Exercise—Adding a Full Unfold Cross Section.
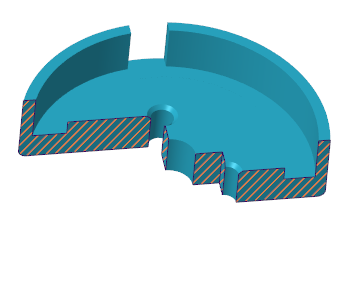 Cross Section Y in Part Mode |
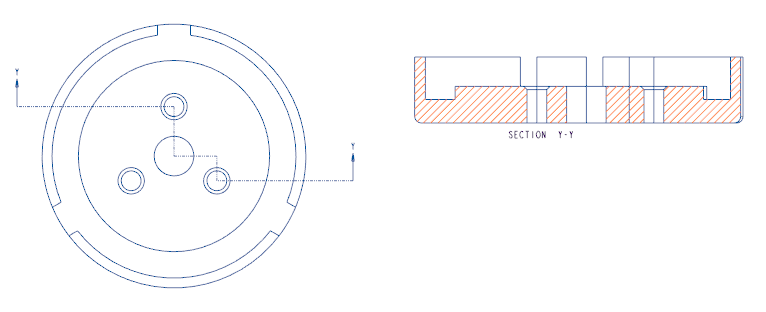 Full Unfold Cross Section in Drawing Mode |
|
|
The Detail option remove_cosms_from_xsecs controls the appearance of datum curves, threads, cosmetic feature entities, and cosmetic crosshatch in a cross-sectional view. Set to all, to remove datums and cosmetics from all types of cross-sectional views.
|