Create reference lines from text and symbols
A reference line leads from a block of text or a symbol to a target element in the drawing. A useful feature of reference lines is that if you later move the source text or symbol, or the target element, the reference line moves accordingly.
When deleting, the reference line is considered as a single, distinct element and can be deleted in one operation. However, if you delete the source text or symbol of a reference line, the line is deleted also.
When the source text or symbol has been specified in the Create Ref Line dialog box, its owner is shown in the Owner box. This helps to remind you of the target domain for the reference line.
To create a reference line,
1. Click Annotation and then, in the Annotate group, click the arrow next to  Ref Line.
Ref Line.2. Click Create Ref Line. The Create Ref Line dialog box opens.
Create Ref Line. The Create Ref Line dialog box opens.3. Click the text or symbol in the drawing from which the reference line is to originate.
The owner of the source is shown in the Owner box.
4. Specify the begin point on the selected text or symbol (using the Create Ref Line dialog box) in one of the following ways:
◦ Click UserDef on, and click the begin point for the reference line.
◦ Click PreDef on to expand the menu. You can now click the source position from the graphic, or first enter the following offsets:
▪ Length Gap: a positive offset of the source point from the base line (or top line) of the source.
▪ Height Gap: a positive offset of the source point from the side lines of the source.
The offsets are measured from a box surrounding the source. This invisible anchor accounts for any rotation of the text or symbol.
5. If necessary, click intermediate points (to stagger the line) between the source and the target point.
6. Under Appearance, at any time during creation of the reference line, you may specify:
◦ Line Type
◦ Color
◦ Arrow Type
◦ Arrow Size
◦ Arrow Fill
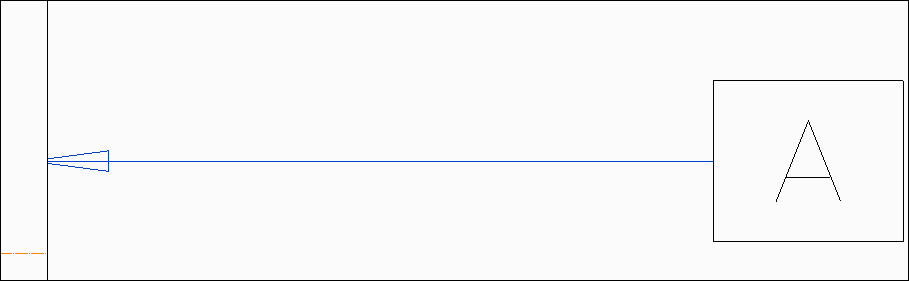
Arrow heads for reference lines are filled. Arrow Fill is available only for reference lines and not for leader or section lines. The Arrow Fill setting is retained in the MI file, when the drawing is saved in the latest current version. The following image displays a non-filled arrow head.
 |
When you export the MI file to external formats like DXF/DWG, the individual arrow fill property is not exported. The arrow heads are filled by default.
|
◦ All Around/Over
You can create the following types of symbols on the reference line:
|
Select
|
Symbol
|
|---|---|
|
None
|
No symbol.
|
|
ALLAROUND
|
 |
|
ALLOVER
|
 |
|
|
• If the reference line does not have an elbow, the symbol is created at the mid-point of the reference line.
• If the reference line has elbows, the symbol is created on the elbow that is closest to the source text or symbol.
• The size of the symbol matches that of the source text or symbol.
|
7. Click the end point of the reference line on the target element.
8. Continue drawing reference lines from the same source, specify a new source, or click  to end the operation.
to end the operation.|
|
To draw a reference line from a different source in the same operation, be sure to click Source and click the new source text or symbol. Otherwise the next reference line will be owned by the previous source.
|
Limitations and restrictions
The source of the reference line must be owned by a view or a sketch owned by a sheet. The target of the reference line, which can also be a dimension, must lie in the same domain as the source. The following lists the possible relationships between reference line source and target:
• View: The source is owned by a specific view, and the target must also lie on the view.
• Sketch owned by a sheet: The source is owned by a sketch belonging to a sheet. The target must also lie on the sketch. This is also possible for a chain of sketches owned by other sketches, as long as the ultimate owner is a sheet.
• Sketch owned by a view: The source is owned by a sketch belonging to a view. A reference line will in this case be owned by the view, and the target can therefore belong to either the sketch or the view.
In particular, a reference line cannot be created from a text or symbol owned by a sheet or a frame.
The Create Ref Line dialog box offers the following options to help you specify the orientation of the reference line:
Orientation at source
|
None
|
No constraints. The source of the line is oriented with respect to the second point of the reference line.
|
|
Horizontal
|
The line emerges from the source horizontally.
|
|
Vertical
|
The line emerges from the source vertically.
|
|
Parallel
|
The line emerges parallel to the source.
|
|
Perpend
|
The line emerges perpendicular to the source.
|
Note that the Parallel and Perpend options are available only for text, and not for symbols.
Attachment at source
You can specify one of nine exact positions on the text or symbol from where the reference line should emerge. Creo Elements/Direct Annotation uses an invisible box around the text or symbol, and the attachment point is determined relative to that box. The possible points are the four corners, the middle points of the four sides, and the center of the text or symbol.
Orientation of line at intermediate points
While specifying intermediate points on the reference line, you can click one of the following orientations:
|
Horizontal
|
The line continues horizontally.
|
|
Vertical
|
The line continues vertically.
|
These can be used to end the line on the target.
Orientation at target
|
Parallel
|
The line ends parallel to the target element.
|
|
Perpend
|
The line ends perpendicular to the target element.
|
|
Angle
|
The line ends at a specified angle to the target element. Enter the required angle in the user input line.
|
For these options, the following point of the reference line must be on the target element. The finished line is adjusted to fit the constraint, if possible. You are warned if the operation cannot be performed.
Control
To cancel the reference line currently being defined, click Restart in the Control section of the Create Ref Line dialog box. Create a new line as before, starting by specifying the source position on the text or symbol.
To remove the last specified point of the reference line, click Back in the Control section of the Create Ref Line dialog box. You can then continue drawing the line from the previous point. Back can be used a number of times in succession to undo several points, but it cannot be clicked after you have completed the reference line.
Example
The figure shows the front and top views of a part, each having a reference line leading to it. The symbol and text each belong to the view they lead to.

The front1 view reference line was drawn as follows:
|
1
|
The Orientation at Source is Horizontal. The Attachment at Source is predefined (PreDef), with a Length Gap offset of 2, and the middle left position specified.
|
|
2
|
The Orientation option Vertical is clicked.
|
|
3
|
The Orientation at Target option Perpend is clicked.
|
|
4
|
The inner circle on the view is clicked to end the reference line.
|
The top1 view reference line was drawn as follows:
|
1
|
The Orientation at Source is None, and the Attachment at Source is user defined (UserDef). The source point is clicked in the viewport.
|
|
2
|
The Orientation at Target option Angle is clicked. An angle of 30 degrees is entered in the user input line, and the view is clicked.
|