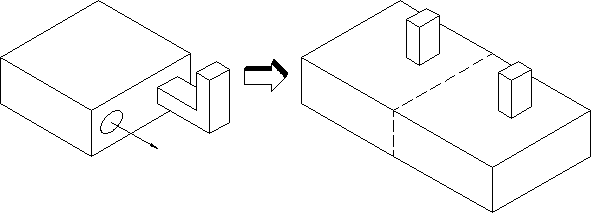
Reflect a part
You can reflect parts around a defined reflection plane, then unite the mirrored parts with the original part. The Reflect command performs the following operations in a single step:
• Makes a copy of the selected parts.
• Mirrors the copy around the reflection plane.
• Unites the copy with the original parts.
You can choose to reflect material on either one side, or both sides, of the reflection plane. When you choose to reflect material on only one side of the reflection plane, any material on the normal side is removed before the part is mirrored. The figure shows that material is being reflected on both sides of the reflection plane.

Depending on the position of the reflection plane, this command can add material to the original part, remove material from the original part, or simultaneously add and remove material.
To reflect a part,
1. Click Modeling and then, in the Model group, click the arrow next to Boolean.
 Boolean.
2. Click  Reflect. The Reflect dialog box opens.
 Reflect. The Reflect dialog box opens.
3. Specify the part or parts to be reflected.
4. Specify the axis of the reflection plane. Click Plane and use the options in the Axis 3D tool.
5. Select from the following options:
◦ Parts: Specifies the name for the part or parts to be reflected in the operation. The default is the active part. To create a new part, enter the name of the part in the text field, beginning with a slash (/) or other path name.
◦ Plane: Specifies the reflection plane; the plane about which a part is reflected.
◦ Both Sides: Specifies whether to remove material on the normal side of the reflection plane (off), or whether to reflect material on both sides of the reflection plane (on).
When Both Sides is off (default), Reflect first removes any material on the normal side of the reflection plane. Only the part facing away from the normal of the reflection plane is mirrored and united.
When Both Sides is on, Reflect mirrors and unites material on both sides of the reflection plane.
6. Click  to complete the operation.
 to complete the operation.