Skin is a standard tool in surface modeling used to generate a surface by interpolating a set of parameter curves making up a mesh.
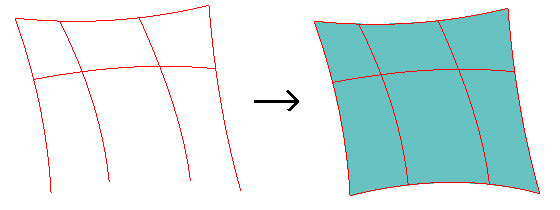
A mesh can be defined using either 2D geometry or 3D curves. The edges are sorted automatically, and the resulting curves are interpreted as parameter curves, from which Skin derives a face. Either a new face part is constructed or a face is added to an existing part. The figure shows an example of a simple mesh (on the left) and the skinned mesh (on the right).
Skin differs from the Insert function in that it generates a surface by interpolating from both boundary curves and curves inside a mesh. This gives you far greater control over the resulting surface. You can skin the following types of surface mesh:
• Standard meshes in which the curves defining the mesh form quadrilateral sections.
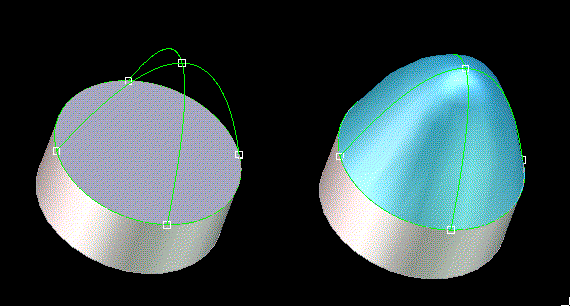
• Meshes in which a boundary curve degenerates to a point forming a triangular surface, such as the following:
• Closed meshes that form tube or cylinder-like surfaces.
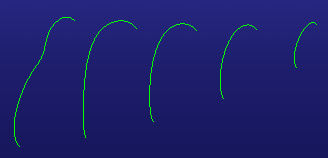
• Loft-type meshes that contain curves for one direction only without an intersection of curves, such as the following:
• Open meshes, such as the following:
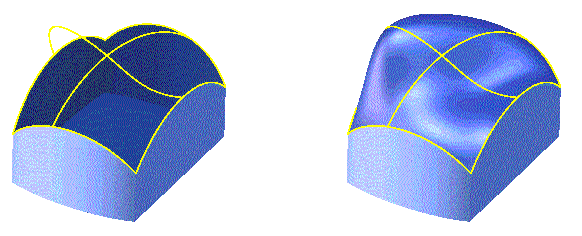
Another use for Skin is for healing: it can repair by bridging possible gaps between non-adjacent surface parts. You can also make a smooth, tangential connection to existing geometry, provided this does not contradict the curve definitions. Care must be taken in defining the underlying Skin architecture.
The Skin algorithm can result in large data structures. It is possible to reduce this by setting a high "inner tolerance". This parameter sets a maximal error on the inner ribs (if there are any). This error factor can be decoupled from the modeling tolerance because the inner ribs are not relevant when it comes to integrating the skinning surface into a model. A large inner tolerance normally results in a smaller data size. The inner tolerance must be larger than the part accuracy.
Skin can be used to simulate a multi-profile sweep. The following example shows a mesh consisting of four open profiles connected by a single spine:
To create a surface with Skin,
1. Activate the Surfacing module.
a. Click File > Modules. The Modules dialog box opens.
b. On the Modules pane, click Surfacing under Licensed.
2. Click Surfacing and then, in the Advanced Surfacing group, click Skin. The Skin and Select dialog boxes open.
3. Specify the part.
4. The Select menu appears with the Add option already active. Click the edges defining the mesh, or specify them in another way.
5. Click End in Select.
6. Select the degree of tolerance (maximal error) of the skinned surface on the inner ribs (if there are any). The Inner Tol list contains various tolerance levels, including that of part accuracy (Part Acc). A larger inner tolerance normally results in a smaller data size for the surface.
7. Set the following options:
◦ Continuity: Choose a Continuity option to create a smooth connection between the boundary of the new surface and an existing surface.
▪ Position: Connection between surfaces is not smooth.
▪ Tangent: Connection between surfaces is smooth.
▪ Curvature: Connection between surfaces is smooth and reflections are reduced or eliminated. The mesh curves used for the operation need a curvature continuous connection to their adjacent faces. Otherwise, the Curvature Continuity option is disabled. For best results, specify one adjacent face (or two faces at opposite boundaries) to which a skin surface will be added.
◦ Flip: Turn the Flip option on to change the surface orientation inside out. Use the Flip option when doing a Gaussian curvature surface analysis and the surface is the inner side of an object. The Flip option is disabled when the surface orientation is fixed and cannot be flipped. For example, when a surface is connected to a neighbor surface, the two surfaces must have the same orientation.
◦ Optimization: Use the Optimization functionality to increase the surface quality of skinned surfaces. Use Preview and Surface Analysis to view and analyze the results of each optimization level.
▪ Off: No optimization. Off is the default for surfaces without a smooth connection to a neighbor surface and for surfaces that contain a degenerated surface (a singular point).
▪ Low: Moderate optimization. Low is the default for surfaces that have smooth connections to neighbor surfaces and for surfaces without a degenerated surface (a singular point). Low will be used in most cases.
▪ Medium: Use Medium if Low does not lead to a good result. The surface quality increases, but the Skinning operation will take longer and the resulting surface will contain more data.
▪ High: Only use High if the lower levels do not lead to a good result. The surface quality increases, but the Skinning operation will take longer and the resulting surface will contain more data.
◦ Keep as Feature: Create a skin feature containing the skin surface's wire and surface parameters. Check this option if you plan to use the Surface Editor command later.
◦ Check Part: Check the part for problems. Creo Elements/Direct Modeling will highlight the edges of the problem area.
8. Click to complete the operation.
Limitations
• The mesh curves must match exactly within the structure. Any intersection points (for example, by connecting a splinar curve to an edge) must be accurate, so that a potential face is correctly defined. Extensive use of the Catch tool and the Inters Point construction geometry tool is vital to ensure the integrity of a profile before applying Skin.
• The input curves may be open, periodic, or closed non-periodic. You cannot mix mesh curves of different types in the U or V direction of the mesh.
• Triangular sections inside a mesh are not permitted.
• If a single mesh curve is formed of several edges, these edges must connect tangentially.
• Mesh curves must not self-intersect.
• The input curves must all be open, periodic, or closed non-periodic. Mixed input meshes are not allowed.
• The order in which the curves are connected to a surface is determined automatically. It is not possible to change this order.
• Optimization is not available for generalized meshes (where one or more boundary curves are missing) or curvature continuous surfaces.
• Curvature continuous limitations:
◦ Surfaces with collapsed boundaries, such as triangular surfaces, are not supported.
◦ Creo Elements/Direct Modeling roughly approximates the internal mesh curves to achieve the user-defined shape. The internal tolerance is not used.
◦ In some cases, a correct solution of curvature continuity or tangent continuity may not be possible. In these situations, an approximation is calculated.
▪ Corner with adjacent surfaces: If the adjacent surfaces on both sides of a mesh corner are specified, the quality of the curvature depends on the shape of the adjacent surfaces. Only a smooth input configuration can lead to a smooth result. The adjacent surfaces should define the same tangent plane in the corner position.
To achieve tangent continuity, the surface normal close to the corner and along the surface boundaries should not change too much. Both surfaces should define the same tangent plane close to the corner.
▪ Chain of faces: If the surface curvature across the boundary varies too much when moving from one surface to the next, the quality of the curvature continuity may decrease.

 Skin. The Skin and Select dialog boxes open.
 to complete the operation.