Move a screw connection
You can move a screw connection to a different location. The parts, features, and pattern group will remain in its original assembly.
Screws created with ConnPoints can only be moved with the Position command found in the Parts/Assemblies menu.
To move a screw connection,
1. Click
Part Library and then, in the
Screw conn group, click the arrow next to
 Modify
.
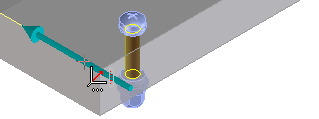
2. Select from the following commands in the Move section:
◦  2 Points
: Position the screw by selecting two points. This creates a linear pattern.
◦  Direction/Length
: Position the screw a direction and distance from the original. This creates a linear pattern.
◦  Rotate
: Position the screw in a radial pattern with the original.
3. Select the screw or pattern in the Structure Browser.
4. Set the position options, depending on which command you chose:
◦ 2 Points: Set the from point (Point 1) and the to point (Point 2) in the viewport.
◦ Direction/Length: Set the Direction in the viewport and type a Length.
◦ Rotate: Select an Axis in the viewport and type an Angle.
5. Click
OK
to complete the operation.