Adding corner reliefs is necessary to prevent any undesired material distortion during manufacturing. The type and dimensions of corner reliefs are very much design dependent and can be freely chosen. But be aware that the size of a corner relief must be big enough to completely separate the two (or more) affected bend zones, so that they don't touch each other (except in one single vertex on the sheet).
Hint: If you want to allow some distortion and overlap of the bend zones in manufacturing, then use the :REPLACEMENT-INFO qualifier in the database to allow an automatic replacement of the 3D corner relief geometry during the flattening process.
Usually the corner reliefs are set automatically when adding new lips to your sheet metal part. But there might be cases where you need a separate command to create a corner relief. For example:
• If you start with a given flat sheet metal (for example a geometry given to you by your customer) you might need to add corner reliefs before you can bend the given part.
• If you want to change an existing corner relief, you need to unfold the part in 3D and punch a different corner relief. Depending on the geometry of the existing and the new corner relief, you may need to remove the old corner relief (close the hole) before punching the new corner relief.
To create a corner relief,
1. Click Sheet Metal and then, in the Model Sheet group, click the arrow next to Relief.
2. Click Corner. The Corner Relief dialog box opens.
3. If necessary, change any of the selections in the dialog box as follows:
◦ Part: Specify the part to be punched. (Default: current part)
◦ Workplane: Specify the workplane to be used for tool profiles. The workplane must be on the face to which the relief will be added. (Default: current workplane)
◦ Corn Angle: Type the angle between bends where the corner relief should be placed. (Default: 90 degree)
◦ 1.Bend Angl: Type the angle for the first bend which forms the corner. (Default: 90 degree )
◦ 1.Process: Select the bend process for the first bend which forms the corner. (Default: default bend process)
◦ 1.Radius: Type the radius of the first bend which forms the corner. (Default: default bend radius)
◦ 2.Bend Angl: Type the angle for the second bend which forms the corner. (Default: 90 degree)
◦ 2.Process: Select the bend process for the second bend which forms the corner. (Default: default bend process)
◦ 2.Radius: Type the radius of the second bend which forms the corner. (Default: default bend radius)
◦ Exch Bends: Click this check box to exchange the parameters of the first and second bend specifications.
◦ Tool Type: Select a corner relief type; for example, round, minimal perpendicular, connected V-shape. (Default: default corner relief type)
Creo Elements/Direct Sheet Metal opens the relevant tool table.
◦ Tool: Select a corner relief tool from the tool table, and click Apply. (You can also double-click the entry.) (Default: default corner relief tool)
Creo Elements/Direct Sheet Metal attaches the tool feedback at its default reference point to the cursor. Usually the tool center must be placed on the intersection of the bend lines.
◦ Angle: Type a corner relief tool position angle. You can also specify the angle in the Tool Angle dialog box, which opens by clicking Angle. (Default: 0 degree)
• Adjust: Change the tool's cursor adjust point. (Default: tool center on bend line intersection)
• Click the position where you want the relief to appear. The tool stays attached to the cursor; you can position it as often as you want.
• Adj to Lip1: Adjust the tool geometry to this point on Lip 1. This option is for geometry-adapted tools only (such as Connected V-shape). (Default: Perpendicular projection of touching vertex between the bend zones (anchor side) to other side of bend zone (lip side))
• Adj to Lip2: Adjust the tool geometry to this point on Lip 2. This option is for geometry-adapted tools only (such as Connected V-shape). (Default: Perpendicular projection of touching vertex between the bend zones (anchor side) to other side of bend zone (lip side))
• Three options help you control relief creation:
◦ To remove a mispositioned tool click Pos Back. Each clicking of Pos Back removes one further tool position.
◦ Clicking Next Relief applies the positioned reliefs without ending the operation. You stay in the routine, ready to place another tool.
◦ To remove a relief that has already been applied, click Relief Back. Each click removes the reliefs created by the previous operation.
• To finish the relief operation click .
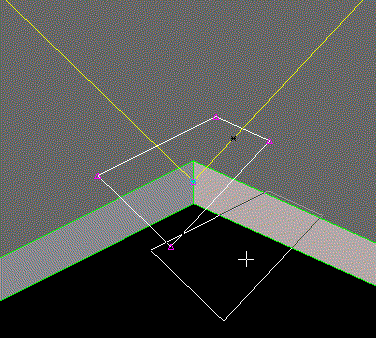
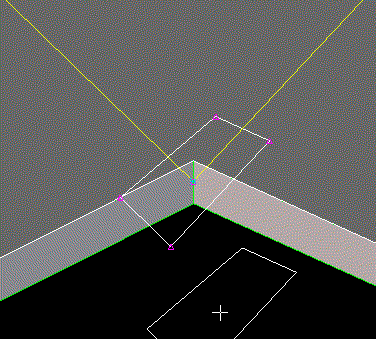
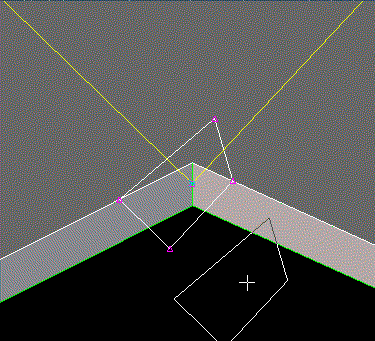
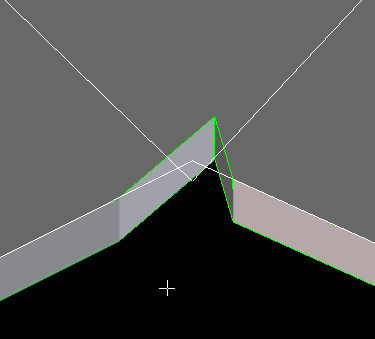
• The orientation of the first and second bends is such that if you look from outside of the sheet metal to the corner (as shown in the graphics above) the first bend is the right one and the second bend is the left one. (This is in the same sense as the corner angle being mathematically positive from first to second bend over the anchor face.)
• The first Lip adjust point is on the intersection of the first lip border with the first bend zone (which is indicated by the corner relief geometry); likewise for the second adjust point. However, if the bend tool must be rotated by 180 degrees, the adjust points are exchanged (first adjust point is on second lip, second adjust point is on the first lip).
 Relief.
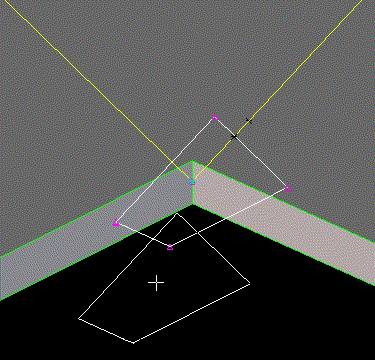

 .
.