Copy a screw connection
When you copy a screw connection, Creo Elements/Direct Part Library creates a pattern of screws.
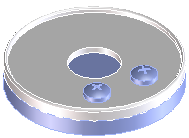
This pattern was created by copying an existing screw with the Rotate command. The original screw is on the left, and the new screw is on the right:
To copy a screw,
1. Click
Part Library and then, in the
Screw conn group, click the arrow next to
 Modify
.
2. Select from the following commands in the Copy section:
◦  2 Points
: Position the copy by selecting two points. This creates a linear pattern.
◦  Direction/Length
: Position the copy a direction and distance from the original. This creates a linear pattern.
◦  Rotate
: Position the copy in a radial pattern with the original.
3. Click Screws and select the screw or pattern in the Structure Browser.
4. Set the position options, depending on which command you chose:
◦ 2 Points: Set the from point (Point 1) and the to point (Point 2) in the viewport.
◦ Direction/Length: Set the Direction in the viewport and type a Length.
◦ Rotate: Select an Axis in the viewport and type an Angle.
5. Select a feature option in the Create features section:
◦ Off: Do not create features. This option is not recommended.
◦ Owner: Select a different owner in the Structure Browser if you a different owner from the default.
◦ Pattern: If a feature pattern does not exist, it will be created.
6. Click
OK
to complete the operation.