Creo Elements/Direct Cabling Tutorial 5: Step 4 of 5
Move end points
Now you will move the wires' end points to their correct locations.
To move end points,
1. Click Cabling and then, in the Modify group, click Move End Pt. The Move Cable End Point dialog box opens.
2. Select the end point of the green wire and connect it to the ground terminal:
3. Repeat these steps to connect the other green wire to the other ground terminal. The endpoints are rerouted to connect to the end of the terminal.
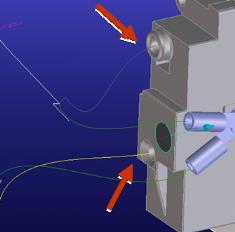
4. Connect the endpoints of the black wires to the push-in locations on the back of the switch. Instead of setting the Destination Point to Terminal, change it to Point and catch the center of each push-in location.
5. You will probably need to change the Tang Dir of the wires, as you did in Tutorial 4. Press the Tab key to change the tangency direction.
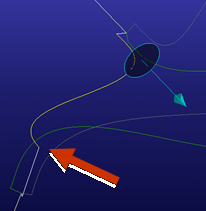
6. Connect the two white wires together. Using the Cab End option, move the endpoint of one of the white wires to attach to the endpoint of the other white wire:
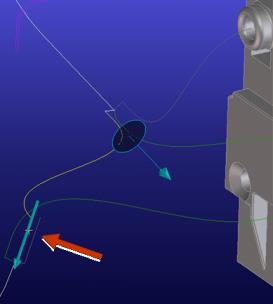
7. Click Tang Dir and hover over the short white wire until you see a green dot. Click to change the dot to an arrow. Press the Tab key to change the direction of the arrow so it points into the cable:
 Move End Pt. The Move Cable End Point dialog box opens.
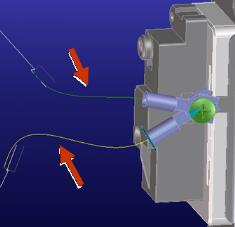
 to complete the operation.