Creo Elements/Direct Cabling Tutorial 5: Step 2 of 5
Create a cable by 2D profile
Now you will add a cable by creating a profile on the workplane.
To create a cable from a 2D profile,
1. Click
Cabling and then, in the
Manual Routing group, click the arrow next to
 Wire
Wire.
2. Click
 Spline Wire
. The
Create Cable dialog box opens.
3. Click Cable or Wire. The Select_Cabling_Type dialog box opens.
4. Click Cable. The Cables dialog box opens.
6. Click Apply.
7. Click Adding in the Modification by 3D CoPilot section of the Create Cable dialog box.
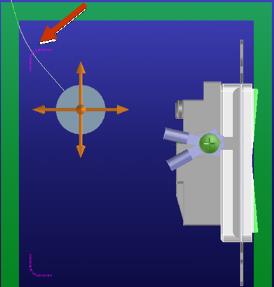
8. Click three points in the viewport to place the cable. Make sure one of the points goes through the construction geometry on w1.1, like this:
9. Click
OK
to complete the operation.
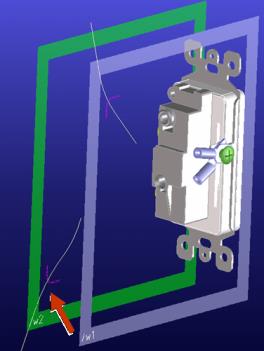
10. Now set w2 active and repeat these steps to create another spline curve passing through the construction geometry on w2, like this: