Creo Elements/Direct Cabling Tutorial 2: Step 2 of 6
Place cable clips
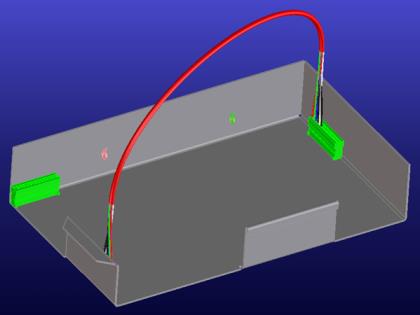
Now you will place cable clips for the first cable. You should place the clips as shown:
To place a cable clip,
1. Click Interface and then, in the Library group, click the arrow next to Call, click Call fixture library. The Cabling Fixtures & Clamps Library dialog box opens.
2. Click 190346, which looks like this:
3. Click Free in the Position section of the E-Lib Component dialog box.
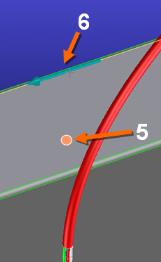
4. Click the vertical wall of the sheet metal part to define the Origin:
5. Click on the top edge of the vertical wall to define Direction X, as shown in the image above. The clamp is placed on the sheet metal wall.
6. Place another clamp on the vertical wall, as shown in the image at the top of this page.
 Call, click
 to complete the operation.