Creo Elements/Direct Cabling Tutorial 1: Step 3 of 4
Create cables between connectors
You can create individual wires or bundles of wires (cables). We will create and route a cable with six wires.
To create a cable,
1. Click Cabling and then, in the Manual Routing group, click Pin to Pin. The Create Cable dialog box opens.
2. Select Cable for the type. The Cables library opens, showing a list of pre-defined cables.
3. Select the C6x1.0 cable.
4. Click Apply.
5. In the Create Cable dialog box, click Connector in the Start Point section.
6. Select the green connector shown in the top right corner of this image:
7. The Map_Conductors_To_Pins dialog box opens. Click Set All to assign each wire to a pin.
8. Click Accept in the Map_Conductors_To_Pins dialog box.
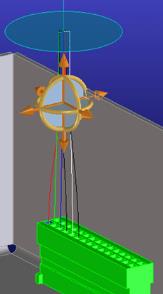
9. The 3D Copilot displays in the viewport. This step defines where the cable housing stops and the wires begin. Move the CoPilot down a bit to move the cable housing closer to the connector, like this:
10. In the Create Cable dialog box, select Connector in the End Point section.
11. Click Part and select the connector on the opposite side of the part.
12. Randomly assign each wire to a pin in the Map_Conductors_To_Pins dialog box, then click Accept.
13. Reposition the end of the housing, as you did with the beginning of the cable.
14. Click to complete the operation.
Repeat the steps above to create a cable between the other two connectors.
 Pin to Pin. The Create Cable dialog box opens.
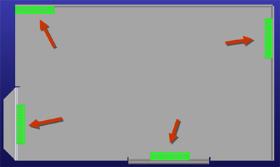
 to complete the operation.