To add a logo or tag to your model, you can create a decal from an existing image, and simply apply it to the model. Creo Elements/Direct Modeling will align the decal to the model just as if you were applying a sticker to a model airplane.
You can create a decal in the Materials tab or the Archives tab of the Rendering browser, and you can choose to use the decal as is, or to apply it with a different fill material.
You can store the decal information along with the model by clicking Store Decals with Model option in the Rendering Settings dialog box. For more information, see
Rendering Settings.
• Decals are stored with the model information but are displayed only when the Rendering module is active.
• Decals that are imported with models are treated as temporary decals. Temporary decals from files carry a filename suffix to differentiate them from the other decals.
• If you open a decal (imported with a model) which has the same name as that of a decal which already exists in the viewport:
◦ The decal which already exists in the viewport is retained.
◦ The decal which is imported with the model is ignored.
To create a decal,
1. Right-click in empty space in the Materials browser, or on an archive or directory in the Archives browser.
2. Click New Entity from the drop-down menu.
3. Click New Decal. The New Decal dialog box opens.
4. Select the image file for your decal.
5. Under Decal Material, click
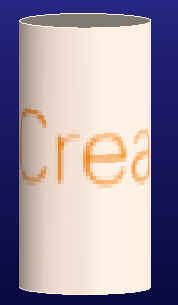
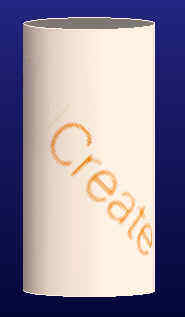
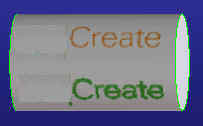
◦ Use Filter Image to use the image unchanged (the top decal in the image).
◦ Material to pick a material for the decal ("Green metal" in the middle decal).
6. Under Decal Size,
◦ Accept the dots per inch (DPI) as defined or enter a new value.
◦ Specify a new Width and Height (in model units, not pixels) if desired.
◦ Click to complete the operation. The new decal appears in the archive with the name of its image; rename it if you wish. The new decal also appears in the Materials tab with the name of its archive in parentheses.
To create a permanent decal from a temporary decal:
1. In Rendering Browser, under Materials tab, right-click the temporary decal and click Copy in the context menu.
2. Right-click the Materials node or any material under it, and click Paste in the context menu. A permanent decal is created under the selected material.
To apply a decal,
1. Drag the decal from the Materials tab or the Archives tab onto the model. Or, right-click the decal and select Apply to Model. The Add Decal dialog appears.
2. Click the face for the decal.
3. You can pick a different decal by specifying a new Decal Path.
4. Under Size, you can change the Width, Height, or Scale. If you check Keep Aspect Ratio, and change one of the parameters, the others will change correspondingly.
5. Click Fit to make the decal fit the face.
6. Click Rotate & Fit to rotate the decal 90 degrees and fit the face.
7. Under Size, change the parameters as required. See above, "To create a decal," for a description of the options.
8. Under Position,
◦ Click Auto Center to center the decal automatically.
◦ Click New Center to specify a new center.
9. Under Move,
◦ Click Direction and use the 3D copilot to choose a direction and length to move the decal.
or
◦ Click Rot. Angle and enter the value to rotate the decal.
or
◦ Click Two Points and follow the prompts to pick the From and To points.
10. Click Update at any time to see the results of the move without closing the dialog.
11. Click to complete the operation.
To move a decal or alter its size,
1. Right-click in empty space in the browser.
2. Click Position Decal in the drop-down menu. The Position Decal dialog appears.
3. Click the decal to move. See above, "To apply a decal," for a description of the options.
To remove a decal,
1. Right-click in empty space in the browser.
2. Click Remove Decal in the drop-down menu. The Remove Decal dialog appears.
 to complete the operation. The new decal appears in the archive with the name of its image; rename it if you wish. The new decal also appears in the Materials tab with the name of its archive in parentheses.