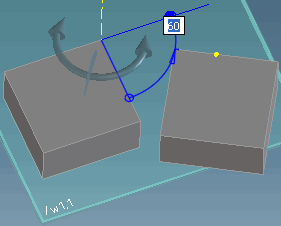
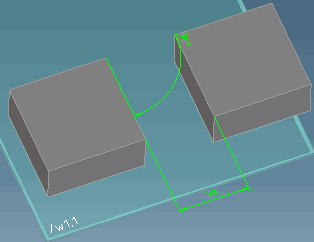
Creo Elements/Direct Modeling allows you to position a part using a linear or an angular dimension between the two parts. The following procedures show how you can position a cube using a linear dimension and an angular dimension between two cubes as shown in the image below.
To position a part using a linear dimension,
1. Click Structure and then, in the Part & Assembly group, click the arrow next to Position.
2. Click Dynamic or any other type of the positioning operation. The Position dialog box opens.
3. Select a part in the viewport.
4. In the Methods section, click Dimension.
5. In the Transform by Dimension section, click Dimension and select the linear dimension between the two parts in the viewport.
6. Move the cursor to reposition the selected part in the viewport. The visual feedback in the viewport shows the distance between the two parts as you move the cursor.
You can also select the linear dimension in the viewport (preselection mode) and drag the 3D CoPilot or type a value to reposition the part.
7. Click to complete the operation.
To position a part using an angular dimension,
1. In the main task bar, click Part & Assy. The Part & Assy task panel opens.
2. Click Position in the Modify section. The Position dialog box opens.
3. Select a part in the viewport.
4. In the Methods section, click Dimension.
5. In the Transform by Dimension section, click Dimension and select the angular dimension between the two parts in the viewport.
6. Move the cursor to reposition the selected part in the viewport. The visual feedback in the viewport shows the angle between the two parts as you move the cursor.
You can also select the angular dimension in the viewport (preselection mode) and drag the angular 3D CoPilot or type a value to reposition the part.
 Position.
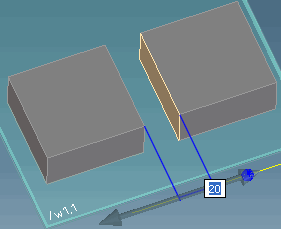
 to complete the operation.