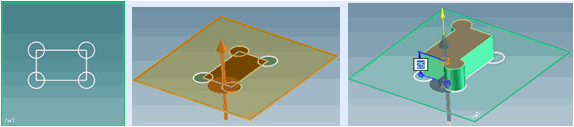
Creo Elements/Direct Modeling allows you to pull any kind of 2D profiles to a part. The example below shows how you can pull intersecting profiles into a 3D part.
After creating the profiles:
1. Click Modeling and then, in the Model group, click the arrow next to Pull.
2. Click Pull Linear. The Pull dialog box opens.
By default, Profiles is selected in the Pull dialog box.
3. Select or type a Part name.
4. Select the workplane either in the viewport or the Structure Browser. All profiles on the workplane are machined.
5. Click Selected to choose specific areas of the profile on the workplane.
The default option in the Operation box is Automatic. Creo Elements/Direct Modeling automatically selects the most likely operation based on the other options in the Pull dialog box. You can also choose Add Material or Remove Material in the Operation box if the system suggested operation is not the wanted operation.
6. In the Type box, select Distance.
7. In the Distance box, type the distance through which to pull the part.
 Pull.
Pull. to complete the operation.