Database Matching Example
1. Draw and dimension the flange as shown in the following figure.
图 117. Initial Part for Database Matching

2. Add the flange to the dimension database:
a. Delete the construction lines from the drawing.
b. Press DIMENSION 2 and pick DB MATCH.
c. Pick ADD
d. Enter the name 'Flange 001' when prompted.
e. Select the entire drawing by boxing it.
Creo Elements/Direct Drafting adds your drawing to the dimension database.
3. Delete all dimensions from your drawing, and using MODIFY, make two or three copies of it. You can further modify each copy by scaling the whole part or resizing the holes. Do not make modifications that alter the basic topology of the part.
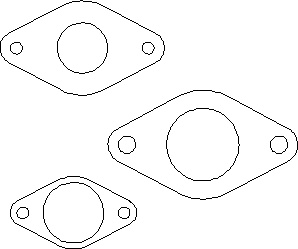
图 118. New Parts Needing Dimensions
4. Return to DIMENSION 2 and pick the 'Flange 001' entry from the database table.
Creo Elements/Direct Drafting shows the 'Flange 001' entry in the style display window.
5. Identify a reference element on the 'Flange 001' entry by picking directly in the style display window. For this example, start by picking the line element on the lower left edge of the flange.
6. Identify the corresponding target element on one of the flanges in your drawing.
Creo Elements/Direct Drafting transfers the dimensioning from the database entry to the target drawing. You may need to repeat the previous two steps in order to transfer the dimensioning for the flange holes.
Note that each time you transfer dimensions from the database to the target, a portion of the database entry is highlighted. Once a database element is highlighted, it cannot be used for further matching during this iteration of the command. You can start a new iteration of the command by re-picking the name of the entry from the database table.
7. Repeat the previous three steps as needed until all the flanges in your drawing are dimensioned.
Assigning Dimensions from the Database
