Editing a Font
To edit a font:
1. Pull down the Tools menu, click Font Editor and Font.
2. In the Select Font dialog box, select a font and click Edit.
3. Pull down the Tools menu, click Font Editor and Show Font to display all of the characters included in this font in the Creo Elements/Direct Drafting drawing area.
4. Pull down the Tools menu, click Font Editor and Edit Character.
5. Enter the character number (for example: 174) of the character you want to edit in the User Input Line. Press [Enter] to display this character.
|
|
If you use this method to add further special characters to the hp_symbols or hp_symbols2 font, be sure to edit an empty character (indicated by a blank square). These special characters are available for use in text, dimensions, and symbols.
|
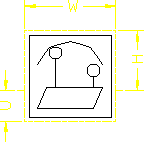
Creo Elements/Direct Drafting displays the character and a yellow character-frame.
6. Modify or delete existing character geometry.
7. Pull down the Tools menu, click Font Editor and Draw.
8. Select the Draw option you want to use to create the new character. Note that the maximum number of unconcatenated elements in a character is 84.
Figure 156. Character Frame
9. Pull down the Tools menu, click Font Editor and Update Character.
10. Enter the character number (you can either keep this number or assign a new number).
11. Repeat this procedure for other characters if/as required.
12. To save the modified font, pull down the Tools menu, click Font Editor and Store Font.
If you use this method to create additional special characters in the hp_symbols or hp_symbols2 font, be sure to save the edited version under a unique name in a separate directory so it can be re-used following an Creo Elements/Direct Drafting update. |