Configuring the Lock Function
Follow the steps given below to configure the lock function:
1. Click the Add Status link to add a new Checked out status.
2. Save the changes.
3. Click State Transition in the context menu to add the required inbound and outbound state transitions.
◦ Inbound transition:
▪ From: Draft
▪ To: Checked out
▪ Name: Check out
▪ Actions: Update item properties:
▪ Locked by: Set to Value Current user
◦ Outbound transition:
▪ From: Checked out
▪ To: Draft
▪ Name: Check in
▪ Permitted: No one, except for Locked by
▪ Actions: Update item properties:
▪ Locked by: Clear
4. Navigate to the Fields tab and change the field configuration to prevent anyone but the Locked by user from editing the item, while it is still in the Checked out state.
a. Change the Document name field permissions to Per Status as shown below:
▪ Default:
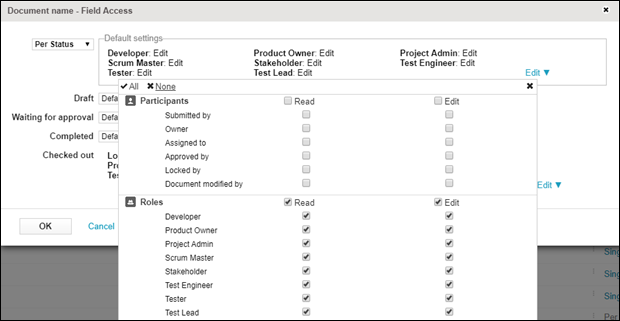
▪ Checked out: read for all, edit only for Locked by.
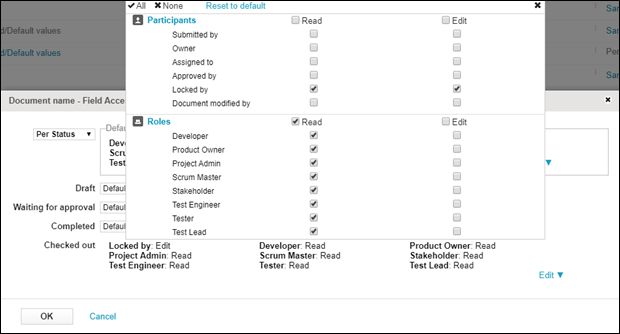
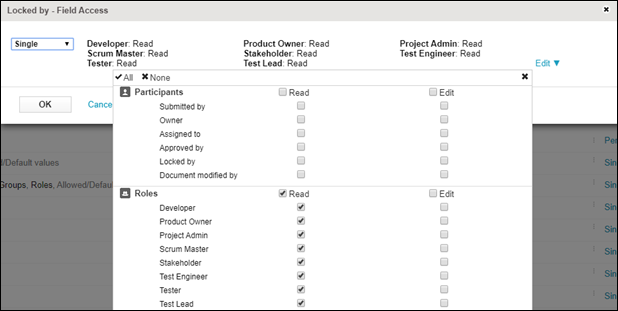
b. Change the permission settings of the Locked by field to read only, as it is only changed by workflow actions.
c. Change the permission settings of the following fields to same as the document name:
▪ Parent
▪ Status
▪ Assigned to
▪ Document
5. Save the configuration.