Windchill +
The following self service actions are available for Windchill +:
• Environment tab—This allows you can add IP addresses to the allow list for the selected environment.
Add Azure Storage Allowed IP Address—This allows to add IP addresses allowed to an Azure Storage Account. This allows to restrict access of the storage account to only those IP addresses or address ranges that are explicitly listed. This means that only clients connecting from those allowed IP addresses will be able to access the storage account's data, including uploading blobs.
• Application tab—This has the following options:
◦ Scan Change Set—This offers pre validation of a build prior to deployment. Drag and drop a file or browse to the file location and select a ZIP file to upload. Click Scan.
◦ Deploy Change Set—This uploads pre-scanned build package, schedule the deployment, and assign observers and approvers. Complete the following steps:
a. Drag and drop a file or browse to the file location and select a file to upload. The file should be a ZIP file.
b. Enter a build description for the build.
c. Select the validation and production environments for the deployment.
d. You can set the deployment date and time.
e. The backup retention period is set to 30 days.
f. You can choose the estimated deployment duration.
g. Add observers and approvers for the particular build by using Add New.
h. Click Deploy.
For more security customization guidelines for Windchill, for scanning and deploying package see Security Customization Guidelines
• Support tab—This has the following administrative action menu items for your environment or application:
◦ Create Support Ticket—Select to open the Support Assistant portal to log a case.
◦ Update Point of Contact—This is used to add or remove contacts which are used for any notifications. Click Next. The window will show point of contact list of already existing contacts if any.
Click Remove to remove a contact. Click on New Contact to add the email address for a new contact. Click Add
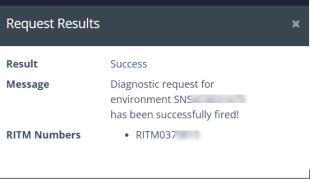
◦ Request Diagnostic Package—Generate a file that can be later be downloaded that provides you with a health and status of your environment. Click Request and then Confirm to send the request for package. The request The package generation can take up to 15 minutes.
Once the package is generated, success message appears in the Request Results dialog box. An email notification is sent for the package creation to the user.
Once package is generated, follow the steps in Activity to retrieve a generated diagnostic package