Chunking Data in HTML Output
If you intend to publish a document to EPUB, HTML Help, or Web formats you can configure your Arbortext Styler stylesheet to break the final output into individual chunks for the purposes of display. Each chunk can be thought of as an individual HTML file, but the actual packaging will depend on the type of final output. You specify what elements should form a chunk boundary, with the option of indicating that a chunk boundary should only be created for certain contexts of the element or when particular conditions are matched. You can also supply further information for each chunk, such as the filename to use when storing that chunk and other metadata values. This supplementary information may either be set as a static value or it may be extracted from other objects within the document.
Note that only elements of Block structure can form a chunk boundary. Refer to the Structure type field in the Breaks category for the element - if the field has a value of Inline you will still have access to the chunk boundary option but this will not be used in final output.
Note also that if there are any footnotes in the document, an extra chunk is created containing just the footnotes for all chunked outputs.
Features in Arbortext Styler support the process of data chunking:
• Defining an element as forming a chunk boundary at which the document should break
The HTML chunking category for an element, a sub-category of Breaks, contains a Chunk boundary option with which you specify whether the element forms a chunk boundary or not
• Setting your stylesheet to obey the chunk boundary settings defined for each element in the document:
The HTML tab of the Stylesheet Properties dialog box includes the Chunk boundaries field , which you can check to ensure final output is chunked as you have specified.
• Specifying a filename for each chunk in output
The HTML Chunking dialog box contains a Persistent filename option with which you specify or generate a file name for a chunk.
|
|
By default, if the id attribute is set for the resourceid element in a DITA topic, it will be used as the filename for the equivalent output HTML file.
|
• Passing metadata to each chunk in output
The Generated Text Editor for an element, accessed via the Generated text category, includes the > > menu option with which you can specify or generate metadata for a chunk.
• Creating contexts or conditions based on Start of HTML Chunk tests
◦ The Context dialog box contains a At start of HTML chunk option, with which you specify that an element's position at the top of an HTML chunk defines its context.
◦ The Start of HTML Chunk Test dialog box, accessed by clicking New Chunk Test in the Condition dialog box, contains options with which you can create a condition that matches either if the element is at the top of an HTML chunk in chunked output, or if it is not.
• Creating a table of contents (TOC) for the chunked output
The properties area for the Tables of Contents list contains a Use for chunked HTML outputs (EPUB, HTML Help, and Web) option with which you can specify that the TOC object will generate a table of contents that includes elements set as forming chunk boundaries in output.
Example: Defining chunk boundaries in Arbortext Styler
The procedure given below describes how to specify that certain elements should be classed as a chunk boundary in chunked output. The document will break into a chunk every time an instance of the element(s) is encountered in the data during the publishing process, with the hierarchy between the elements maintained if applicable. The example is based on the transport.xml sample document, located at Arbortext-path/samples/styler.
1. In Arbortext Editor, click > to create a new stylesheet for the document.
2. In the Elements list, highlight the chapter element and give it a Division style via the > menu option. Set the division level to 1 in the Division Details dialog box.
3. Navigate to the Breaks category for the element and note that the Structure type field reads Block, since the element is styled as a division. Navigate to the HTML chunking category.
4. Set the value of the Chunk boundary field to Yes. You will see that the color of the label of the HTML Chunking field changes to blue, to indicate that an explicit value exists for the option.
5. Repeat steps 2–4 for the sect1 element, giving it a division level of 2.
6. In
Arbortext Editor, choose > > . In the
Stylesheet field of the
Publish for Web dialog box (see
Publish for Web dialog box), ensure your stylesheet is selected. Click
OK to start the publishing process.
7. Refer to the source output files and notice that you have the following data chunks, in addition to the frame and graphic definition files and directories:
◦ 1 first level chunk, numbered sect1, based on the document element. The top level element of the document is always chunked automatically.
◦ 6 second level chunks, numbered sect1sect1 - sect1sect6, based on the chapter elements.
◦ 1 third level chunk, numbered sect1sect2sect1, based on the only sect1 element in the sample document, the Employee Information section in chapter 2.
Note that the chunks are labeled according to the Arbortext Styler default naming scheme, based on their hierarchy within the document. You may elect to provide your own numbering scheme for the chunks - the steps detailed in Defining persistent chunk filenames in Arbortext Styler below give an example of how this can be achieved.
Example: Defining persistent chunk filenames in Arbortext Styler
This example describes how to provide filenames for the data chunks created in the section Defining chunk boundaries in Arbortext Styler. The file name of each chunk will be the title of the original element on which the chunk is based.
1. Set your stylesheet to chunk the content of the transport.xml sample document into chapter and sect1 elements, as described in Defining chunk boundaries in Arbortext Styler above.
2. In the Elements list, highlight the chapter element and navigate to the Breaks category for the element. Go to the HTML chunking sub-category.
3. Set the value of the Persistent file name field to Yes. The From attribute and From XPath options become active.
4. In the From XPath field, enter the expression title. This will extract the content of the chapter's title child element.
5. Repeat steps 2–4 for the sect1 element.
6. In
Arbortext Editor, choose > > . In the
Stylesheet field of the
Publish for Web dialog box (see
Publish for Web dialog box), ensure your stylesheet is selected. Click
OK to start the publishing process.
7. Refer to the source output files and note that the chunks are each labeled according to the title they have in the original document. Spaces and punctuation from the original title have been transformed for the file name during the publishing process.
Example: Passing metadata to chunked HTML output
The procedure defined below describes how to include metadata with each data chunk created in Defining chunk boundaries in Arbortext Styler.
Once complete, you will be able to view the assigned metadata by inspecting the source HTML for the chunk.
1. Set your stylesheet to chunk the content of the transport.xml sample document into chapter and sect1 elements, as described in Defining chunk boundaries in Arbortext Styler above.
2. In the Elements list, highlight the chapter element and navigate to the Generated text category for the element. Click the Edit button for the Before-text field to open the Generated Text Editor.
3. In the Generated Text Editor, choose the > > menu option to open the Insert Metadata dialog box. Check the Static option and select Author from the list of standard metadata types. Note that you can also type a name of your own in this field.
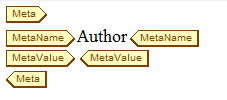
4. Click OK to exit the dialog box. Arbortext Styler inserts a Meta tag, with MetaName and MetaValue children. The MetaName field contains the name of the metadata type you selected in the previous step:
5. In the MetaValue field, type the value for the Author metadata type.
You can also generate the value of the MetaValue field programmatically if you wish. For example, if your chapter contained keywords, you could enter the Keywords metadata type in the MetaName field, then use the > menu option in the MetaName field to insert all occurrences of the keyword element from the chapter into the field. In this instance Arbortext Styler will extract the content of each keyword element and insert them in the MetaValue field wrapped in an _sfe:CollectionItem element, creating a comma separated list of keywords for the chapter.
6. Place your cursor after the Meta tag, and choose a second > > action. This time, check the Dynamic option in the Insert Metadata dialog box and click OK. Arbortext Styler inserts a Meta tag again, this time with both MetaName and MetaValue tags blank.
7. In the MetaName tag, type the metadata type Title.
8. In the MetaValue tag, choose the > menu option. In the Insert Element Content dialog box, configure the following settings:
◦ Select the By XPath option
◦ In the Expression field, enter the expression title
◦ Set the Insert field to Only content
Here you have specified that the value of the Title metadata type for a chunk will be set to the title of the chapter upon which the chunk is based. Click OK to exit the dialog box . Arbortext Styler enters an ElementContent tag into the MetaValue field.
9. Choose > to exit the Generated Text Editor. The Add before element content field now contains <_gte:Meta>, <_gte:MetaName>, and <_gte:MetaValue> tags defining the metadata settings you made.
10. In
Arbortext Editor, choose > > . In the
Stylesheet field of the
Publish for Web dialog box (see
Publish for Web dialog box), ensure your stylesheet is selected. Click
OK to start the publishing process.
11. Refer to the source output files and open the first chapter chunk in a text editor. Note that the head element contains your metadata definition, in the form shown below:
<meta name="Author" content="John Smith"
scheme="atiChunkerMeta">
<meta name="Title" content="Introduction"
scheme="atiChunkerMeta">