Working with Tables
For this exercise, use the Arbortext XML DocBook document you modified in the previous exercise.
Arbortext Editor provides a table editor to assist you with authoring tables. The table editor hides the tags associated with a table and enables you to manipulate the parts of a table in the Edit view.
Follow these steps to insert and work with a table in your document:
1. Place your cursor inside a para tag.
2. Choose > .
The Insert Table dialog box opens.
3. In the Rows field, click the up arrow to increase the number of rows to 7, then click OK.
The table is inserted into your document.
4. Place the cursor in the first cell in the table.
5. Click on the
Insert Column Left
toolbar button.
A new column is inserted into the table to the left of the cursor. You can also choose > > for this and other table operations.
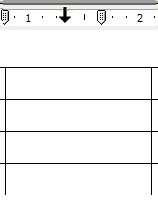
6. Select the new column by clicking in the column ruler above the column.
The cursor changes to a down arrow when it is in the ruler:
7. Click on the
Span Cells toolbar button

.
All of the cells in the column are joined together.
8. Click the arrow on the
Apply Cell Shading
toolbar button to display a drop down list.
9. Select a color from the color palette.
10. Click in another area of the table to deselect the column to view the cell shading.
For more information, refer to the
Tables Overview,
Table Menu Introduction, and
Table Toolbar topics in the
Arbortext Editor help.
Parent topic