Inserting Graphics in Generated Text
You can insert graphics in generated text. For example, you might want to have a graphic associated with a warning in your documents.
|
|
Graphics in generated text in tables must be configured for a specific type of element to be visible in XSL outputs (EPUB, HTML File, HTML Help, and RTF). A generated graphic will not appear if it is configured directly for the entry context. You must insert a non-table element within the entry context and configure the generated text for that context, for example p in entry.
|
You can provide alternate text for graphics in generated text in PDF (with
PTC ALD engine) and HTML outputs, to increase accessibility to content for screen readers. Please refer to
Alternate Text Support for Graphics for information.
Example: Inserting a Graphic in Generated Text
The procedure below describes how to include a graphic in the title of the formalpara elements in your document.
1. In Arbortext Editor, open the transport.xml document located at Arbortext-path/samples/styler.
2. Choose > to open the stylesheet currently associated with the document for edit. This is a read only stylesheet so you will need to save a local copy if you want to make amendments.
3. In the Elements list, select the title in formalpara context.
4. Go to the Generated text category.
5. Click the Edit button next to the Before-text field. The Generated Text Editor opens.
6. Choose the > menu option. The Locate Graphic File to Reference dialog box opens.
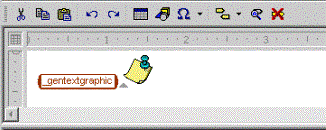
7. Browse to the cmt.gif file in the Arbortext-path/graphics subdirectory (or a graphic of your choice), then click Open. The graphic is inserted in the Generated Text Editor window.
If the graphic selected with this method is located in Arbortext Editor's current graphics path, then just the filename will be inserted as the value of the pathname attribute of the _gentextgraphic element. To edit the path, choose > for the _gentextgraphic element
| This method may generate a path for the graphic that will not work for all stylesheet users. It is recommended that you store all graphics referenced in stylesheets in a directory that is included in all users' graphics path. You can then enter just the filename as the value of the pathname attribute and the graphics will appear for all users. |
8. Choose > to save your generated text setting and exit the editor. The Before-text field in the Generated text category now contains details of the graphic you have referenced:
9. Choose > .
In the Print Preview window, note that the selected logo is inserted before the title in each formalpara.
PDF Graphics
You can insert a page of a PDF as a graphic in generated text. PDF graphics are supported in PDF output generated by the PTC ALD engine (note: not supported in PTC ALD’s print output, or in other output types). When inserting a graphic element in generated text, select .pdf from the list of file types presented by the Locate Graphic File to Reference dialog box.
Refer to
Bitmap and Vector Graphics for information about PDF graphics.
A single page of a selected PDF is inserted as a graphic. If no page information is provided, the first page will be extracted and inserted as a default. The value of any attribute for the graphic element that has the
View role will represent a specific page to be inserted. Refer to
Configuring a Graphic Element for further information on how to configure the graphic element’s attribute.
Graphic Conversion
Graphics that are inserted by the stylesheet must be in a format that needs no conversion. For example, you may need to convert a CGM graphic to EPS format and configure the stylesheet to insert the EPS file for output to PDF. You may need to configure separate generated text for each required output format.

