Developing a New Stylesheet Using Existing Modules
Arbortext Styler enables you to create a new stylesheet using existing modules. This procedure assumes that you have modules available to use as building blocks for the new stylesheet. In particular, you need to have the Styler Formatting Elements (SFE) required for the stylesheet available in a module. You can move those to a module by opening an existing stylesheet in Arbortext Styler that contains the necessary SFEs, selecting the SFEs in the Elements list, and using > to move the elements to a module. If the SFEs are not available in a module, you could also copy and paste them from another stylesheet or create them.
|
|
SFEs associated with a Table of Contents definition must remain in the same module as the associated table of contents and cannot be copied or moved to another module. These elements begin with _sfe:Toc. If any of these SFEs are selected, the Move.. and Copy to Module menu items are disabled. If the Table of Contents definition is moved to a module, the associated SFEs move with it.
|
Example: Developing a New Stylesheet Using Modules
1. In Arbortext Editor, open your document and select > menu to open an empty stylesheet.
2. In Arbortext Styler, select > .
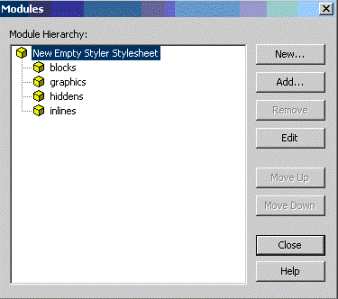
The Modules dialog box opens.
3. Select the Add button.
The Add Module dialog box opens.
4. Browse to the directory containing your stylesheet modules, select from the list of modules a module you would like to add to your stylesheet, and click the Add button.
The new module appears in the Modules dialog box's module hierarchy as a child of whatever module was highlighted in the dialog box when you clicked the Add button. Keep the top level module selected in the dialog box to create a set of sibling children.
5. Repeat steps 3 and 4 until you have added all relevant modules to your stylesheet.
6. Click Close to exit the Modules dialog box.
7. Select >
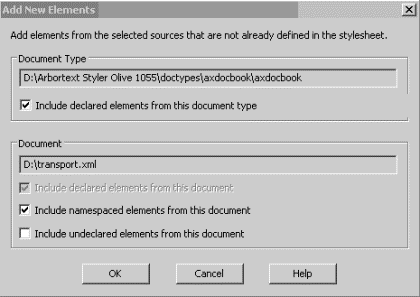
The Add New Elements dialog box opens.
8. Make sure that the document type listed in the Document Type field is correct and that the Include declared elements from this document type option is selected:
9. Click OK to close the dialog box. All elements from the document type that have not been added to the stylesheet via the module hierarchy are added to the root module in the Elements list.
10. Apply styling to any unstyled elements that have been added to the stylesheet, via the > menu option.
11. If you did not add a module containing other necessary definitions, use the appropriate user interface elements to develop those definitions.
For example, use the > menu option to create a new table of contents definition.

