Creating a Module from an Existing Stylesheet
Arbortext Styler allows you to create stylesheet modules from definitions in an existing stylesheet. The first procedure shown below demonstrates how to move all of the inline elements from an existing stylesheet into a module.
You can use the same process to move other element styles, User Formatting Elements, Styler Formatting Elements, or any other definitions in your stylesheet into sharable modules.
|
|
You may need to select the > and > menu options to ensure these elements are displayed in the Elements list. In addition, the list views each contain a list of user interface components, enabling you to move or copy those definitions to modules.
|
Example: Creating a Module Containing Inline Elements from an Existing Stylesheet
The procedure given below describes how to create a new module and add to the module all elements in the stylesheet that currently have a particular style.
1. In Arbortext Editor, open the transport.xml document located at Arbortext-path/samples/styler.
2. Choose the menu option > to open the associated stylesheet for edit. This is a read only stylesheet so you will need to save a local copy if you want to make amendments.
3. In Arbortext Styler, select > .
The Modules dialog box opens.
4. Select the New button.
The New Module dialog box opens.
5. Browse to the Arbortext-path/custom/stylermodules directory and enter inlines.style in the File name directory. Enter a Title and Description, if desired, and select Create to create the new module.
The new module appears in the module hierarchy in the Modules dialog box.
6. Click Close to exit the Modules dialog box.
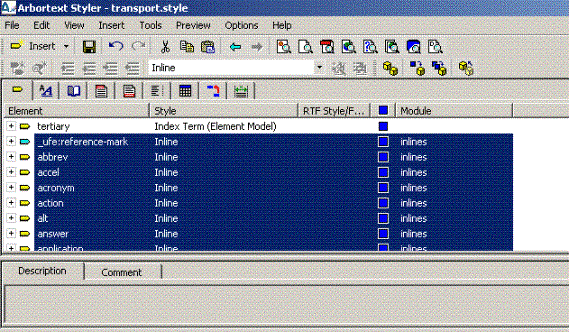
7. In Arbortext Styler, select the Style heading in the Elements list. The list is sorted by style.
8. Select all the elements that have the Inline style, using CTRL+left click or SHIFT+left click to select multiple elements if necessary.
9. Select > .
The Move to Module dialog box opens. You can also copy selected definitions to a module via the > menu option.
10. Select inlines in the Move selected Elements to hierarchy and click OK.
The Inline elements are moved to the inlines.style module. The entry for each inline element in the Elements list is updated to indicate that it is part of a module in the stylesheet:
11. If, once you have allocated your objects to the module, you wish to protect the module with a read-only restriction, you can do this by navigating to the module in your desktop explorer, right clicking and selecting
Properties, then checking the
Read-only option in the
General tab. Your module will then be displayed in the
Modules box with a lock icon over its regular icon

and the title text grayed out.
You cannot subsequently add objects to a read only module.