Inserting Symbols in Generated Text
You can insert symbols in generated text. For example, you might want to have a symbol such as an arrow associated with procedures or warnings in your documents.
Example: Inserting a Symbol in Generated Text
The procedure below describes how to include an arrow in the title of the note elements in your document.
1. In Arbortext Editor, open the transport.xml document located at Arbortext-path/samples/styler
2. Choose > to open the stylesheet currently associated with the document for edit. This is a read only stylesheet so you will need to save a local copy if you want to make amendments.
3. In the Elements list, select the note element.
4. Assign the Block style to the note element via the > menu option.
5. In the Elements list, select the title element.
6. Elect to create a new context for the title element by selecting the > . The Context dialog box opens.
7. In the Context dialog box, click New Parent then select note from the list.
8. Click OK to save the new context and exit the Context dialog box.
9. Select the title in note context from the Elements list then go to the Generated text category.
10. Click the Edit button next to the Before-text field. The Generated Text Editor opens.
11. In the Generated Text Editor window, choose the > menu option. The Insert Symbol dialog box opens.
12. In the Font field, select Courier New from the list.
13. Choose a right-pointing arrow from the symbol set, then click Insert.
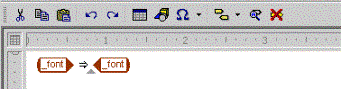
14. Click Close to exit the dialog box. The Generated Text Editor now displays the symbol you have inserted, wrapped in a _font object.
15. Choose > to save the gentext setting and exit the Generated Text Editor The Before-text field now displays the symbol you have selected.
16. Choose > .
In the Print Preview window, note that the right-pointing arrow is inserted before a note title.
Also note that the symbol is the same size and color as the text in the title. If you want the symbol to be a different color or size, you must apply format it individually in the Generated Text Editor window. Use the settings in the Font dialog box, accessed via the > menu option.