Adding a Cross Reference
For this exercise, you will need the prodMeetings.dita and meetingAgenda.dita documents you created in the previous exercises.
You use DITA cross references to link to content inside of the topic you are authoring. Cross references can also link to another topic, a tag inside of a topic, or an external document. Cross references use the xref tag.
Follow these steps to add a cross reference in the prodMeetings.dita document:
1. Open prodMeetings.dita in Arbortext Editor.
2. Choose > .
The Resource Manager opens with the Link/Xref tab active.
3. Select the word “agenda” in the first li tag in the unordered list (ul).
4. Use the Resource Manager browser to navigate to the folder where you saved the DITA Glossary document created in these exercises.
You can use the Look in: drop-down list to find the place in your file system where the folder is located. The folder you select in the Look in: list is displayed in the browser. Double-clicking on a folder displayed in the browser makes that folder and its hierarchy the focus in the browser. Use the plus and minus signs in the browser to open and close both folder and document hierarchies.
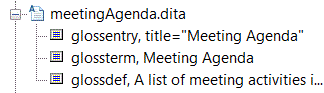
5. Click on the plus sign next to the meetingAgenda.dita document to open that document's hierarchy in the browser:
6. Select the glossentry tag and click the Insert button.
The Resource Manager inserts the cross reference into your document:
7. Double-click on the agenda link.
The meetingAgenda.dita topic opens in a new Arbortext Editor window.
8. Close meetingAgenda.dita and save prodMeetings.dita.
For more information, refer to the
Using Linking with DITA Documents and
Link/Xref Tab topics in the
Arbortext Editor help.
Parent topic