Context Control Stream Editor
Context Control Streams in Layout Developer
When formatting XML in Layout Developer, Context Control Streams can be used to associate either JavaScript or tags with elements, contexts and/or conditions. As with Page Sequences and other control stream types, there has never been a user interface to allow users to create them easily.
Context Control Stream Debugger Interface
Selecting a Context Control Stream in the Resources panel of the Debugger opens the tag with three view options:
• Text — Edit the tag contents in plain text mode
• Object — Edit the object which represents the control stream similar to that used in the Inspector
• Tree — The new interface to Context Control Streams added in this release.
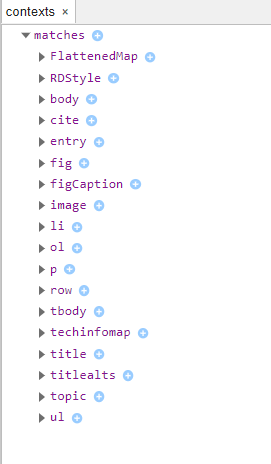
Opening the Tree view gives the user a list of elements under a ‘matches’ root node. The elements are sorted alphabetically. This is different from the Object view of matches, in which they are sorted as they are defined. It is also different from the Object view because it is the element name which is listed at this level, the individual matches for each element are listed below the element name. This is important to remember as this view helps the user find the correct match more quickly and easily.
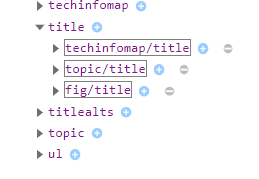
The matches for the elements can be viewed by opening the node by clicking on the triangle icon to the left of the element name. When open, the matches are listed like this:
New matches can be added by clicking on the blue circled ‘+’ icon to the right of the ‘matches’ root node and the element name. When adding a new match from the root, the user gets an empty location path field in which to type their match. When adding a match from the element name, the element name is pre-populated in the new match string. The valid matches are documented elsewhere for Context Control Streams. The match string can be edited by double-clicking on the string (as indicated by the box around the location path). In addition, the match can be deleted by clicking on the grey circled ‘-’ icon.
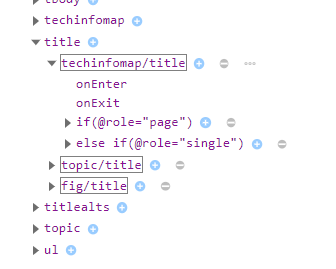
When the match node is opened by clicking on the triangle icon to the left of the match string the ‘onEnter’ and ‘onExit’ events are shown along with any conditions.
New conditions can be added by clicking on the blue circled ‘+’ icon to the right of the match and the condition (as conditions can be nested). The type of condition (if, else if, else) can be changed as can the condition string itself by double clicking on the condition. The type of condition is controlled based on the position of the ‘+’ icon to ensure only valid types are created.
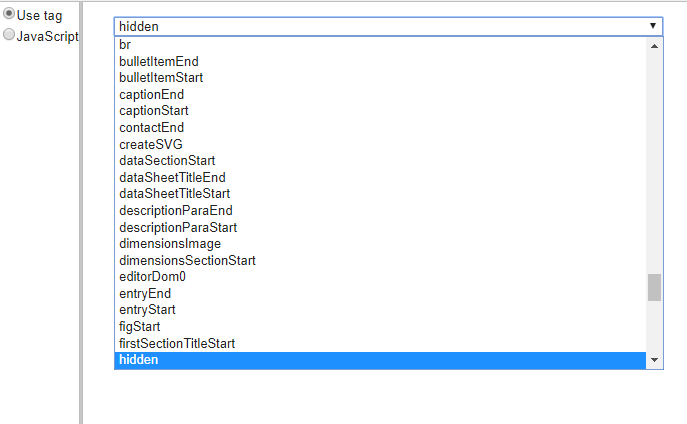
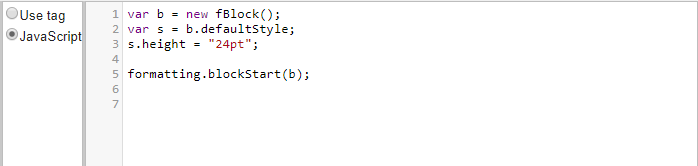
Selecting the ‘onEnter’ or ‘onExit’ events for a match or a condition splits the edit window in two to show a new panel for applying the desired action to that event. Two options are provided:
• Use tag — allows users to associate a tag in the document with the event by selecting it from a combo box.
An empty option is provided at the top of the list if no action is required.
• JavaScript — allows users to enter JavaScript in the debugger’s JavaScript editor:
If a user changes from ‘Use tag’ to ‘JavaScript’ and makes a change to the JavaScript content, the tag association is lost. Equally, if the user switches to ‘Use tag’ and makes a change, the JavaScript is lost. If no change is made, the existing selection and associated action is maintained.