Working Offline
If you do not have access to the network, PTC Arbortext Content Delivery enables you to work offline on your local device. Your device is usually associated with a web system on the network at your workplace. You must periodically update the service information on your system from either the web system or from a disk or other media provided by your administrator. If you create a shopping cart while working offline, you must synchronize your shopping cart information with the web server once you are back on the network.
Setting Up Your Offline System
Working on a offline system requires a license. Once PTC Arbortext Content Delivery is installed on your system, you are directed to the Activate System page:
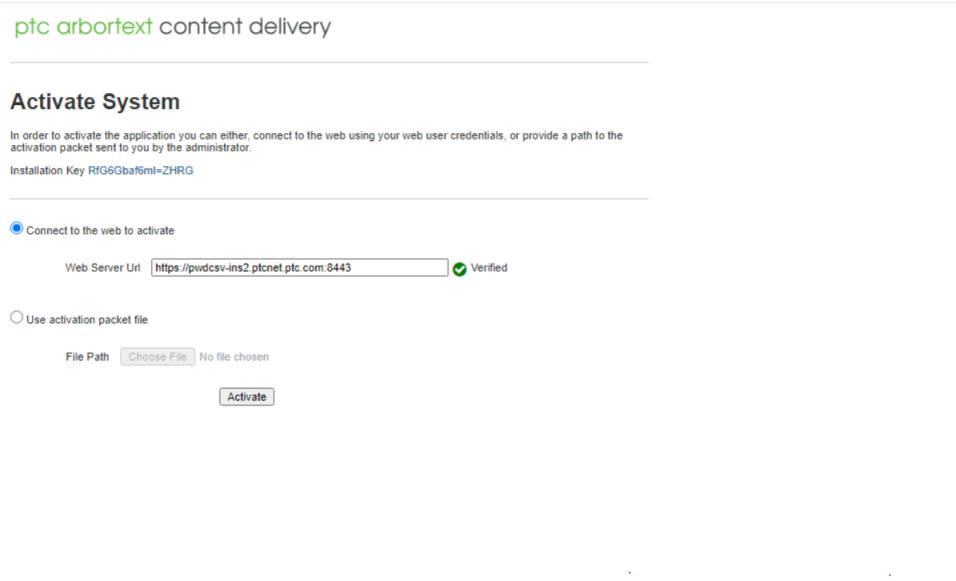
Use this page to activate the license through either your web system or by pointing to the license activation file on your system. You can provide or update the Web System URL that you use for PTC Arbortext Content Delivery offline system on this page. In the Web System Url box, you can type in the URL of the web system that you want to synchronize with the offline system. If the URL is verified, you can synchronize the web system updates with the offline system. If the URL is invalid or not-reachable, an error indication appears on the UI. If you have set the Web Server URL during the offline installation, then this Web System Url field will be auto-populated.
• This feature is only visible to the offline users who have the Activation or Download and Update Content privileges, or if the system is not active. • The Web Server URL is used for the Offline license activation, and data loading and synchronizing. You must not modify the Web Server URL, unless your system administrator instructed you to connect and synchronize with another web server. |
Activating a license through the web for the first time requires either the service group administrator or the activation privilege. Note that an offline system can only be associated with one Service Group. If you are associated with more than one service group, you are prompted to choose a service group in the Choose a Service Group window when you activate your offline system.
Once your license is activated, you can later click on the menu icon at the upper right of the PTC Arbortext Content Delivery home page and select Update License to update the license:

This opens the Update License page:
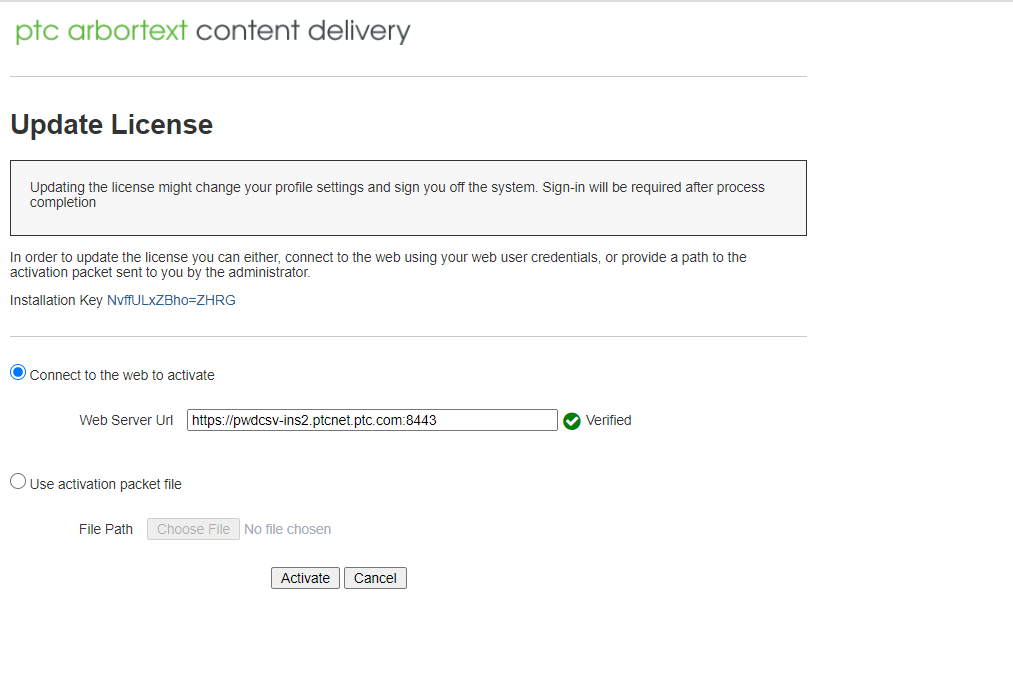
Use this page to either connect to your web server to update the license or to point to the license activation file on your system.
Changing Your Password
You can change the password you use for PTC Arbortext Content Delivery on a offline system. Note that you must be connected to your web server to change your password.
The first time you use the system, you are prompted to change your offline password. After that, the Change Password option is available in your user settings:
Use this option to change your password as desired. Enter the new password, matching the required format, and confirm it. Click Save Changes to complete the password change.
Resetting Your Password
You can also reset your password if you have forgotten it. Note that you must be connected to your web server to reset your password. If you forget your offline password, click Cancel when you are at the PTC Arbortext Content Delivery Offline login screen and you are automatically directed to the Reset Password page:

Use this option to reset your password. Enter the new password for your offline system, matching the required format, and confirm it.
Once you click Save Changes, you are redirected to web system login page where user need to be authenticated to complete the change.
Using Your Offline System
When you are working on a offline system, the synchronize icon is available at the upper right corner of the interface. This icon provides an indication of the current state of the system. When working offline, the icon is  . When connected to the web system, the icon changes to
  .
.
. When connected to the web system, the icon changes to .When the system has pending new service information updates, the icon changes to show the number of updates  . During the process of loading new updates, the icon begins to rotate. If update is successful, the icon changes to the connected version. If the update fails, it changes to
  .
.
. During the process of loading new updates, the icon begins to rotate. If update is successful, the icon changes to the connected version. If the update fails, it changes to .When offline, clicking on the icon opens this menu:
The following options are available:
• Log into web system – Enables you to log into the web system associated with your device.
You must log into the web system to update your service information and synchronize your shopping carts.
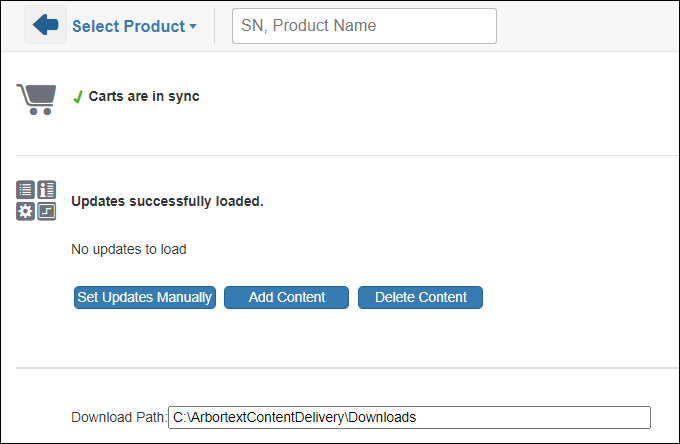
• Go to synchronize view – Opens the synchronize window:
The auto-load preferences are controlled by the web administrator. |
When you are logged into the web system, you can open the synchronize view by clicking on the synchronize icon. Use this page to synchronize the information in your shopping carts with your home system and to update the service information on your offline system. The page indicates the last time you successfully synchronized your system. It also contains settings for how content updates are loaded, such as whether to transfer and load updates automatically.
Shopping carts usually automatically synchronize when you are connected to your web server.
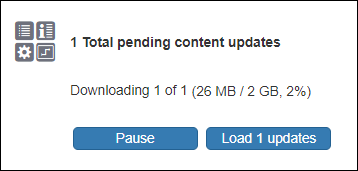
The service information is provided as repositories or packages of information to load on your system. Loading data is a two step process. First, you must transfer the content updates to which you have access to your system. When you have pending content updates, the system indicates the number of pending updates and their size after you have synchronized your information.
If you are downloading updates from the internet, click Download to transfer all available updates. Updates in this case are stored in the location specified in the Download Path option. Once the updates start transferring, the system shows the progress of the download:
If your administrator provides updates on a disk or other physical media, select Set Updates Manually to transfer updates from the desired media drive. You can only use this option when not connected to the internet. This opens the Set Updates Manually window where you can enter the desired path in the Type in a folder path option. The system automatically suggests possible paths as you type in the option.
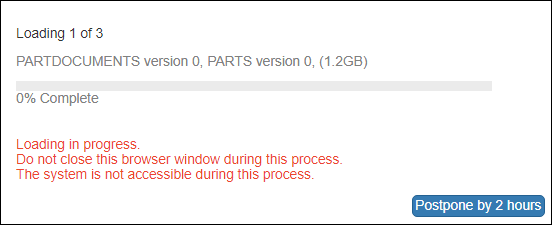
After the transfer is complete, click Load updates to start the content update process. System is unavailable during the content load process. You can manually postpone the loading process from the following locations, as required:
• The loading window — Click Postpone by 2 hours.
• InS.properties file — Specify the number of hours as the value for the property com.ptc.sc.updates.load.reschedule.interval as a pre-installation step.
• wt.properties file — Specify the number of hours as the value for the property as a post-installation step.
Deletion Of Segments In Your Offline System
The loaded segments consuming hard disk space in your offline user interface may no longer be required. To delete those segments from your offline user interface complete the following steps:
1. On the offline synchronization page, click Delete Content.
2. The Delete Content dialog box that opens contains a list of segment names and their collection names. This list is sorted based on the last modified date and time, with the recent most entry at the top. You can delete one or more segments. To select all the segments in the system, select the Select All checkbox. The SHARED (PARTDOCUMENTS, PARTS) checkbox is automatically selected.
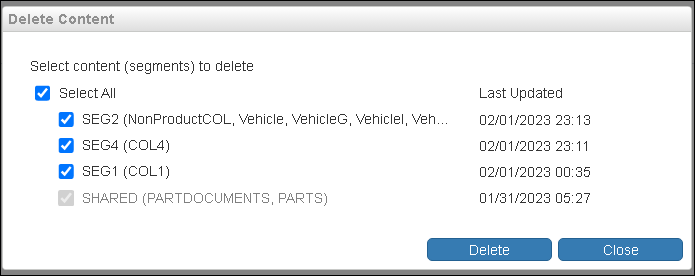
If you select individual segments, the SHARED (PARTDOCUMENTS, PARTS) checkbox is automatically cleared.
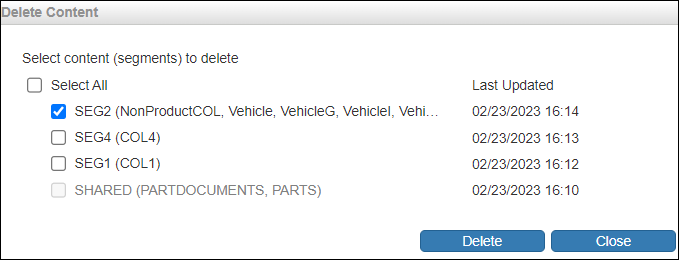
3. Click Delete A confirmation window opens when you select either one or all segments.

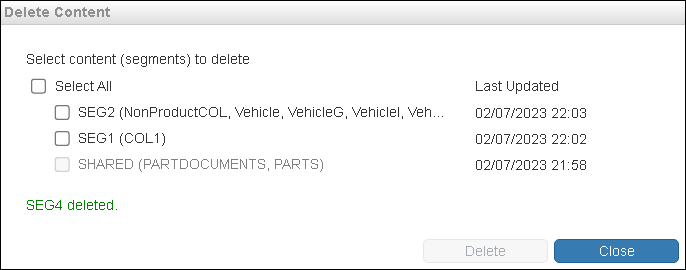
4. Click OK. The Delete Content dialog box shows the progress of the deletion process.

The Delete Content dialog box shows the segments which are successfully deleted.
A success message confirms that the segments have been deleted.
If the deletion process fails, click View Errors to see the errors due to which the process failed.

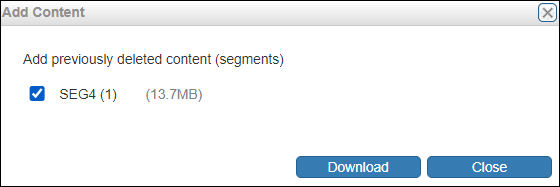
Add the Deleted Segments in Your Offline System
To add the previously deleted segments to the offline system, click Add Content. To get access to the deleted segments, you must connect to the web system. Click Download to initiate the process.
Offline Setting
The following setting is available:
Download Path – Specifies the location on your system where you want content updates to be stored.
The system automatically suggests possible paths as you type in the option. Note that for newly installed and reinstalled offline systems, it is recommended that the folder you use for the download path is initially empty.