Adding Custom Attribute
This topic explains how to add the custom attribute to WindchillDS and PTC Arbortext Content Delivery. The following image shows the Attribute page details.

Adding the Custom Attribute to WindchillDS
Update the 00-core.ldif file at the location <HOME>\SW\SW\System\WindchillDS\server\config\schema\00-core.ldif as follows:
1. Create an entry similar to the following example: attributeTypes: (2.5.4.55 NAME ‘dealerCode’ SUP name X-ORIGIN 'RFC 4519')

In the above example, the sequence number of attribute highlighted in green is unique. If there is an existing entry with 2.5.4.55 and a new attribute is to be added, then the sequence number to be used should be 2.5.4.56. The sequence number value goes on incrementing for each newly added custom attribute. |
2. Add the custom attribute as ‘$ dealerCode’ to class 'organizationalPerson’ as shown in the following image:

3. Add the custom attribute as ‘$ dealerCode’ to class 'inetOrgPerson' as shown in the following image:

4. Restart the WindchillDS.You can see the newly added custom attribute in WindchillDS.

Adding the Custom AttributePTC Arbortext Content Delivery—User
1. Perform the steps mentioned above in the Adding the Custom Attribute to WindchillDS section to work with user attributes.
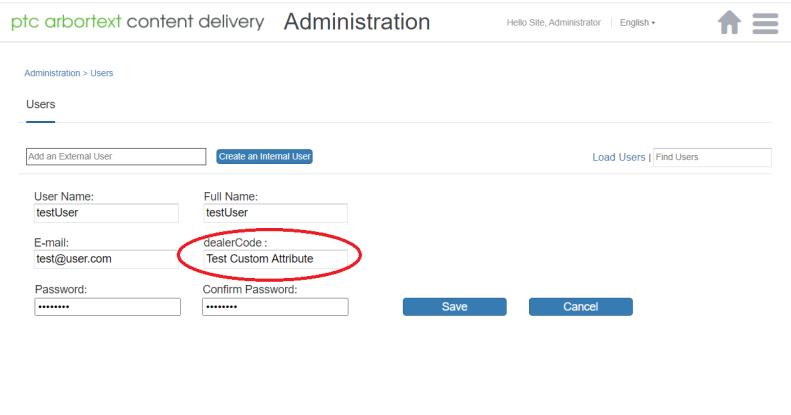
2. Navigate to the PTC Arbortext Content Delivery Administration home page. Click Attributes and from the Types pane, select User. Add the custom attribute as shown in the following image:

3. Click the Page Preview link to navigate to the default location of custom attribute.
4. The files used for customization of the display location of User custom attribute are as follows:
◦ ~\SW\SW\Applications\Windchill.ear\codebase.war\delivery\custom\templates\userCustomAttribute.tmpl.html
◦ ~\SW\SW\Applications\Windchill.ear\codebase.war\delivery\scadmin\views\users\userTabSet.html
The userTabSet.html file is used to change the display location of the custom attribute. It includes userCustomAttribute.tmpl.html for iterating over the list of custom attributes created.

5. If you want to change the processing of the custom attribute, you can make changes in the usersListController.js file.
Adding Custom Attribute—Service Group
1. Navigate to the PTC Arbortext Content Delivery Administration home page. Click Attributes and from the Types pane, select Service Group. Add the custom attribute as shown in the following image:

2. Click the Page Preview link to navigate to the default location of custom attribute.

3. The files used for customization of the display location of Service Group custom attribute are as follows:
◦ ~\SW\SW\Applications\Windchill.ear\codebase.war\delivery\scadmin\views\dealerships\templates\serviceGroupCustomAttribute.tmpl.html
◦ ~\SW\SW\Applications\Windchill.ear\codebase.war\delivery\scadmin\views\dealerships\templates\createDealershipDetails.html
◦ ~\SW\SW\Applications\Windchill.ear\codebase.war\delivery\scadmin\views\dealerships\templates\editDealershipDetails.html
The createDealershipDetails.html file is used to change the display location of the custom attribute. It includes serviceGroupCustomAttribute.tmpl.html for iterating over the list of custom attributes created.

4. If you want to change the processing of the custom attribute, you can make changes in the createDealershipCtrl.js file and for editing, in the editDealershipCtr.js file.
Adding Custom Attribute—Shopping Cart
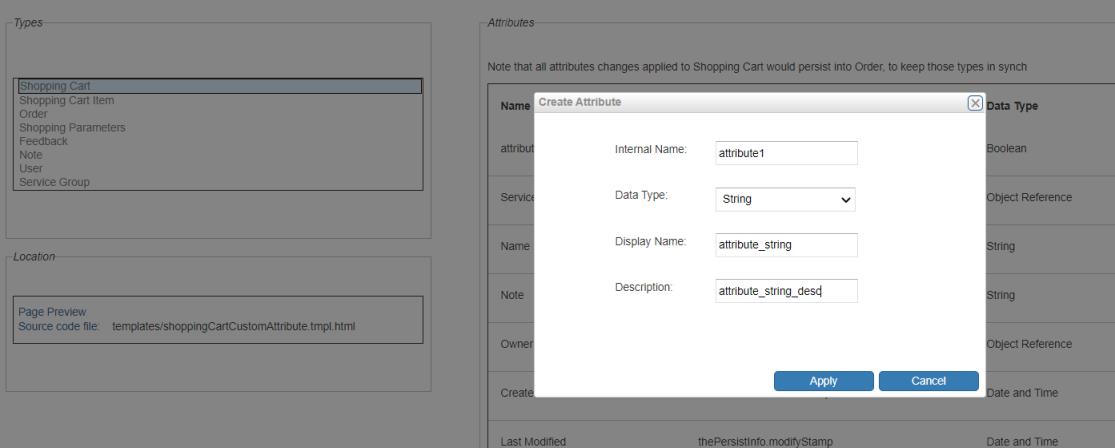
1. Navigate to the PTC Arbortext Content Delivery Administration home page. Click Attributes and from the Types pane, select Shopping Cart. Add the custom attribute as shown in the following image:
2. Click the Page Preview link to navigate to the default location of custom attribute.
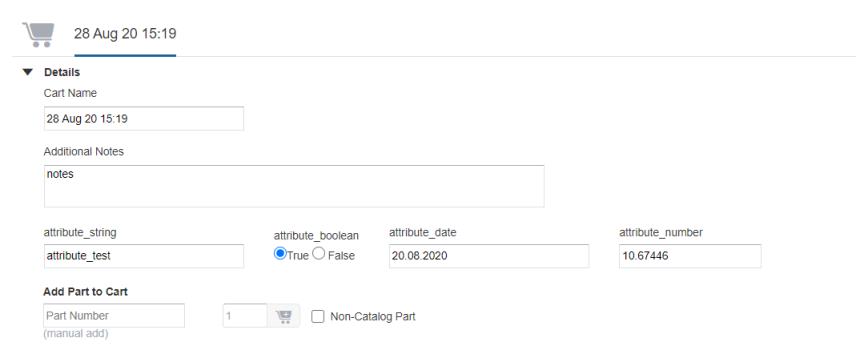
3. The files used for customization of the display location of Shopping Cart custom attribute are as follows:
◦ ~\SW\SW\Applications\Windchill.ear\codebase.war\delivery\custom\templates\shoppingCartCustomAttribute.tmpl.html
◦ ~\SW\SW\Applications\Windchill.ear\codebase.war\delivery\app\views\cartDetails\details\details.html
The details.html file is used to change the display location of the custom attribute. It includes shoppingCartCustomAttribute.tmpl.html for iterating over the list of custom attributes created.

4. If you want to change the processing of the custom attribute, you can make changes in the detailsTabController.js file.
Adding Custom Attribute—Shopping Cart Item
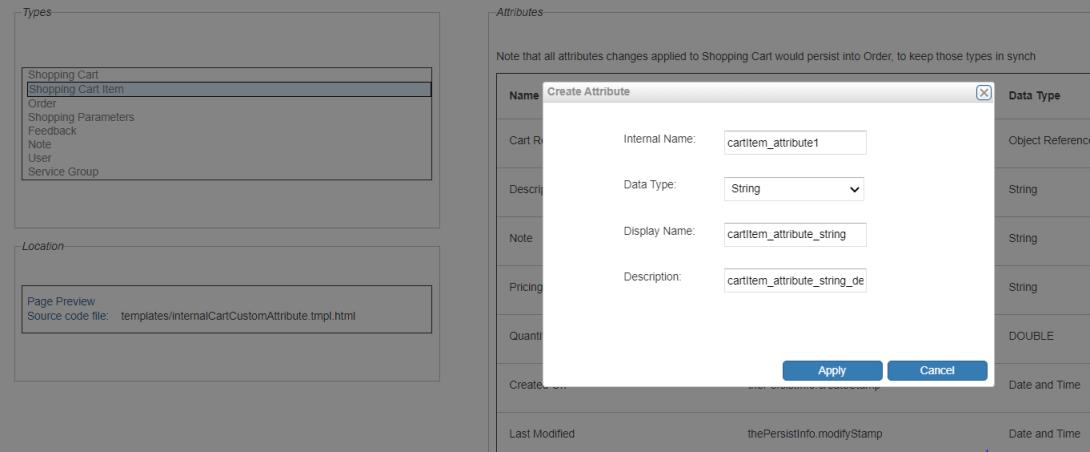
1. Navigate to the PTC Arbortext Content Delivery Administration home page. Click Attributes and from the Types pane, select Shopping Cart Item. Add the custom attribute as shown in the following image:
2. Click the Page Preview link to navigate to the default location of custom attribute.
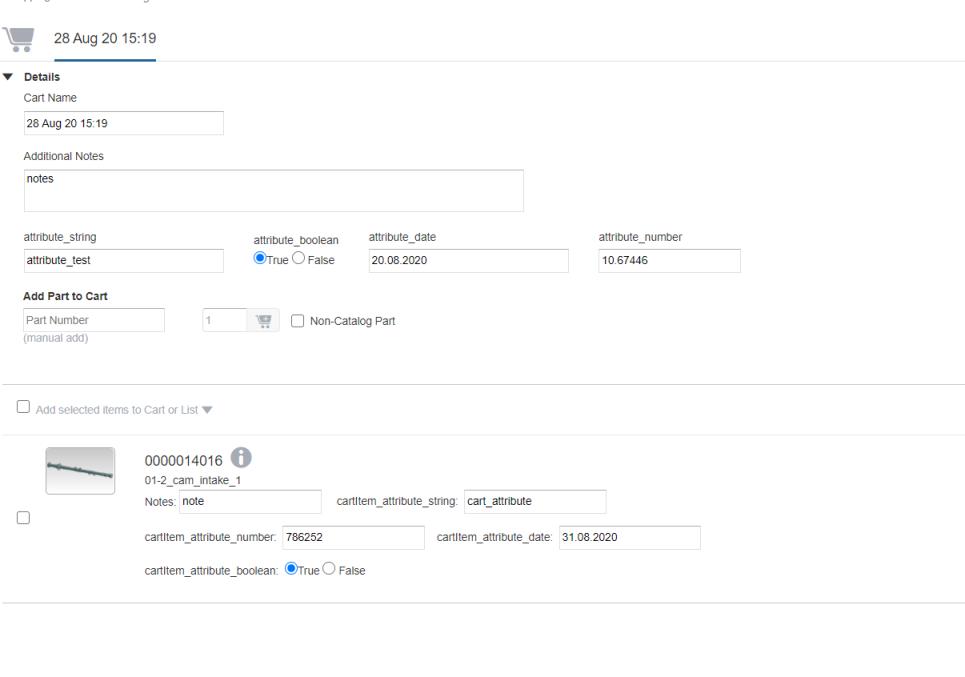
3. The files used for customization of the display location of Shopping Cart Item custom attribute are as follows:
◦ ~\SW\SW\Applications\Windchill.ear\codebase.war\delivery\custom\templates\internalCartCustomAttribute.tmpl.html
◦ ~\SW\SW\Applications\Windchill.ear\codebase.war\delivery\templates\cartItems.tmpl.html
The cartItems.tmpl.html file is used to change the display location of the custom attribute. It includes internalCartCustomAttribute.tmpl.html for iterating over the list of custom attributes created.
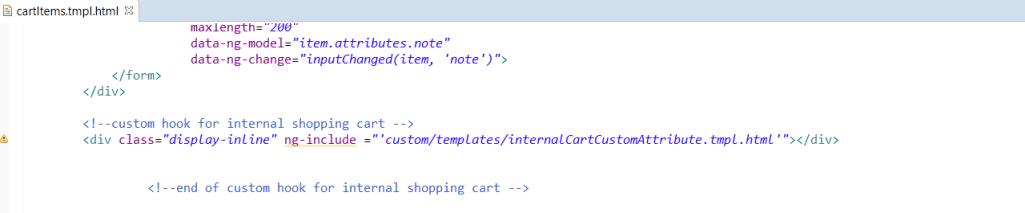
4. If you want to change the processing of the custom attribute, you can make changes in cartDetailsController.js file.
Adding Custom Attribute—Feedback
1. Navigate to the PTC Arbortext Content Delivery Administration home page. Click Attributes and from the Types pane, select Feedback. Add the custom attribute as shown in the following image:

2. Click the Page Preview link to navigate to the default location of custom attribute.
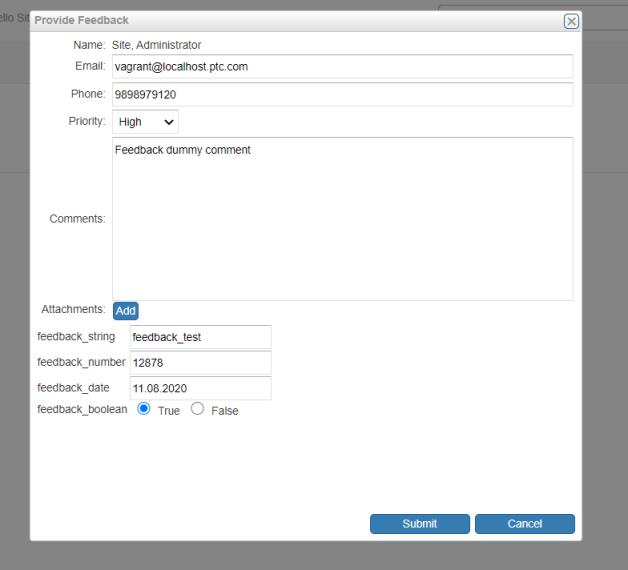
3. The files used for customization of the display location of Feedback custom attribute are as follows:
◦ ~\SW\SW\Applications\Windchill.ear\codebase.war\delivery\custom\templates\customAttributes.tmpl.html
◦ ~\SW\SW\Applications\Windchill.ear\codebase.war\delivery\app\views\feedback\feedbackForm.html
The feedbackForm.html file is used to change the display location of the custom attribute. It includes customAttributes.tmpl.html for iterating over the list of custom attributes created.

4. If you want to change the processing of the custom attribute, you can make changes in the feedbackFormController.js file.
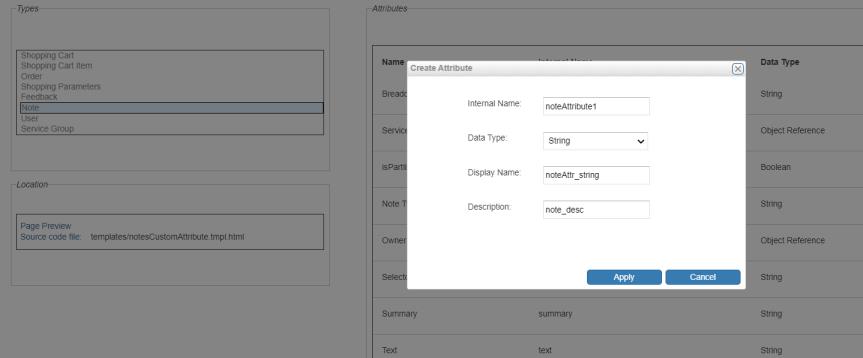
Adding Custom Attribute—Notes
1. Navigate to the PTC Arbortext Content Delivery Administration home page. Click Attributes and from the Types pane, select Note. Add the custom attribute as shown in the following image:
2. Click the Page Preview link to navigate to the default location of custom attribute.

3. The files used for customization of the display location of Notes custom attribute are as follows:
◦ ~\SW\SW\Applications\Windchill.ear\codebase.war\delivery\custom\templates\notesCustomAttribute.tmpl.html
◦ $WT_HOME\codebase.war\delivery\templates\notesList.tmpl.html — for generic notes.
◦ ~\SW\SW\Applications\Windchill.ear\codebase.war\delivery\templates\note.tmpl.html — for Information Structure (IS).
◦ ~\SW \SW\Applications\Windchill.ear\codebase.war\delivery\templates\notesList.tmpl.html — for partlist.
The notesList.html file is used to change the display location of the custom attribute for the generic note section. It includes notesCustomAttribute.tmpl.html for iterating over the list of custom attributes created.The note.tmpl.html file is used to change the display location of the custom attribute for the IS note section. It includes notesCustomAttribute.tmpl.html for iterating over the list of custom attributes created.The notesList.tmpl.html file is used to change the display location of the custom attribute for the partlist note section. It includes notesCustomAttribute.tmpl.html for iterating over the list of custom attributes created.

4. If you want to change the processing of the custom attribute, you can make changes in the following files:
◦ notesListController.js—for generic note section.
◦ noteController.js—for IS note section.
◦ notePartListItemController.js—for partlist note section.
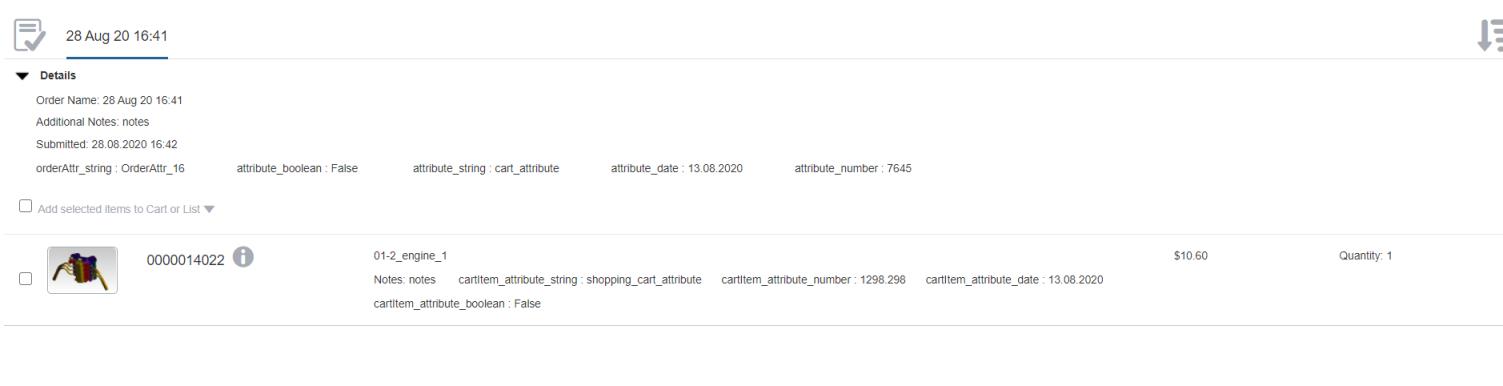
Adding Custom Attribute—Order
1. Navigate to the PTC Arbortext Content Delivery Administration home page. Click Attributes and from the Types pane, select Order. Add the custom attribute as shown in the following image:

2. Click the Page Preview link to navigate to the default location of custom attribute.
3. Order values are handled and processed in the DefaultCommerceDelegate.java file at location ServiceCenter\modules\Core\src\com\ptc\sc\services\plugins\DefaultCommerceDelegate.java.