Editing Plant Information
Use the Edit Plant Information window to edit the attributes of plant data and department data objects. You can also export the attributes into a Microsoft Excel file and edit them. However, you need to first specify the department data objects that you want to edit. You can do so when creating a department data object using the New Department Information window or by setting filters using the Manage Department Information window. For more information, see Creating Department Data from Windchill, Selecting a Plant for Editing.
Using Edit Plant Information
Perform the following procedure to edit the attributes:
1. In the New Department Information window, click Save and edit, or in the Manage Department Information window, click Continue.
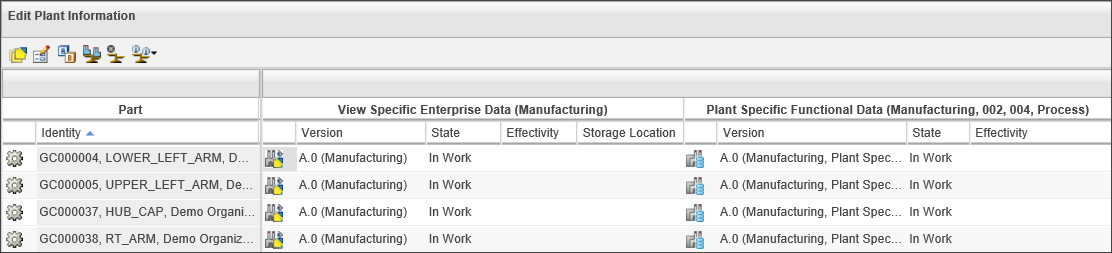
The Edit Plant Information window opens. It displays the attributes of department data and plant data objects created using the New Department Information window or filtered using the Manage Department Information window. The attributes for each type of object are grouped together for each associated part. Each group displays unique set of master attribute values for each object type. The group header represents the object type and the associated master attribute values. The column header represents the name of the attribute. Each icon within a group indicates whether the attributes belong to a department data or plant data object. An attribute cell may be blank if there are no department data and plant data objects associated with the part.
The Identity, Version, State, Effectivity, and Storage Location columns are displayed by default. Each attribute column displays a drop-down arrow when you hover over the column header. You can sort or remove some of the columns using the actions displayed in the arrow list. Use the Filters action to filter the rows based on a specific attribute value of a column. The value that you need to enter for the Filters action depends on the data type of the selected column attribute. Few examples are given below:
◦ String: Enter a numeric or alphabetic value.
◦ Enum: Select the required values from a list.
◦ Integer: Enter greater than, equal to, or less than values.
◦ Date: Select a date to specify the Before, After, and On values.
• You can customize the table view to display the columns for other attributes of plant data and department data objects. For more information, see Creating and Editing New Table Views. • Object reference attributes are displayed in the table only after you create a database column and an attribute of ObjectReference data type. For more information, see Creating Object Reference Picker in Custom Configuration Specification, Adding Columns to Types. • You can add or edit object reference attributes of only those objects that can be iterated or revised. • You can customize the default search and save actions performed on the object reference attributes. For more information, see Configuring Search Delegate for Object Reference Attributes and Configuring Save Delegate for Object Reference Attributes. |
2. Double-click a cell to edit an attribute value.
The values for effectivity and the master attributes such as supply chain, location, category, and phantom manufacturing part are non-editable. Use the Edit Common Attributes action to edit the master attributes. For more information, see Editing Common Attributes of Plant Data, Editing Common Attributes of Department Data. |
You can edit multiple attributes simultaneously. For more information, see Editing Multiple Attributes. |
3. When you edit an attribute, the related object is checked out automatically. Click  to check in the objects. For more information on checking in an object, see Viewing Checked Out Objects.
to check in the objects. For more information on checking in an object, see Viewing Checked Out Objects.The attribute values of the checked in objects are updated.
You can customize the display settings of the Edit Plant Information table and its contents using properties and delegates. For more information, see Customizing Edit Plant Information Table.
Using Microsoft Excel
The Export to Excel feature lets you export the attributes of plant data and department data objects into an Excel file. You can then edit the attributes and import the updated file.
1. To generate the Excel file, set the criteria in the Manage Department Information window and click Export to Excel.
Open the exported file. It displays the attributes of the selected parts and the associated department data and plant data objects filtered using the Manage Department Information window.

The attributes for each type of object are grouped together for each associated part. Each group displays unique set of master attribute values for each object type. The group header represents the object type and the associated master attribute values. The column header represents the name of the attribute. An attribute cell may be blank if there are no department data and plant data objects associated with the part.
2. Edit the required attributes of the plant data and department data objects in the file. You cannot update the effectivity values of the objects.
You cannot update the values for effectivity and the master attributes such as supply chain, location, category, and phantom manufacturing part. Use the Edit Common Attributes action to edit the master attributes. For more information, see Editing Common Attributes of Plant Data, Editing Common Attributes of Department Data.
• Do not modify the number or view of the part in the Excel file. When modified, the part is not identifiable when importing the file. • If you modify other attributes of the part, the information is not updated. • A date attribute follows the format YYYY-MM-DD HH:MM:SS, such as 2019-07-30 15:32:12. |
3. Import the Excel file using the Import Plant Information from Spreadsheet action from the Actions menu on the Details page of a product.
For more information on this action, see Importing Plant Information from Excel.