Authoring Jasper Report Using ReportTemplate
Integration with Jasper Studio
Jasper Reports library, an open source reporting library, which generates report based on design file (.jrxml). The design files are XML representation of all the authoring and designing which is performed in Jasper Studio. Any chart, table or other element that is dragged into the design, is captured automatically in JRXML file. Jasper Studio is Eclipse-based authoring platform, with which the Jasper design can be created.
|
|
Jasper Studio can be configured as an Eclipse IDE plug-in.
|
Steps for integrating WINDCHILL JAR files in Jasper Studio:
1. Create a new JasperReports project.
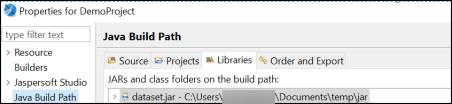
2. Open Java Build Path on project properties windows and add the dataset.jar from Windchill on build path. Dataset jar has datetime as suffix for example. dataset30112020105242.jar.
3. Perform the > step for the Jasper project.
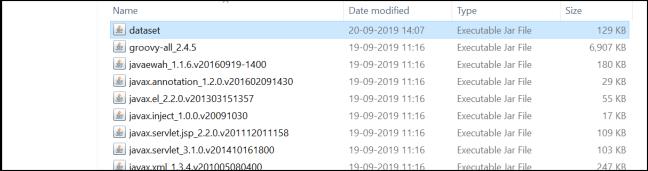
4. Add dataset.jar to Jasper Studio directory under, {STUDIO_INSTALLATION_DIR}\plugins folder as shown below. This is required because the PREVIEW feature of Jasper Studio has its own classpath which reads the JAR files from the plugins folder.
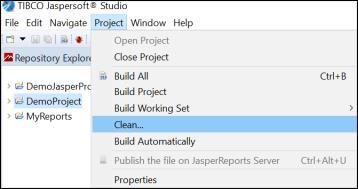
5. Restart the Jasper Studio.
Authoring in Jasper Studio
As part of Windchill integration with Jasper Studio, implementation of WNCJRDataSource is done that provides support for Report Templates through ReportTemplateJRDataSource.
Steps for authoring the Jasper reports are as follows:
1. Jasper project should be configured in Jasper Studio. Right click Project and Jasper Report option.
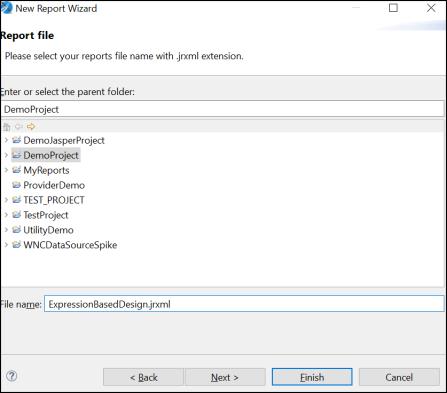
2. Specify a name to the Jasper file and click Next.
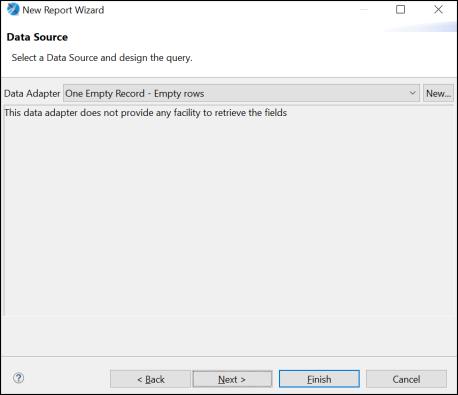
3. To create an empty record adapter, select > > .
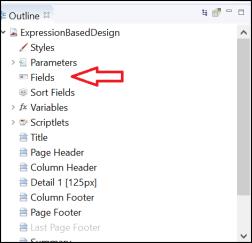
4. Project Outline doesn't have any Fields.
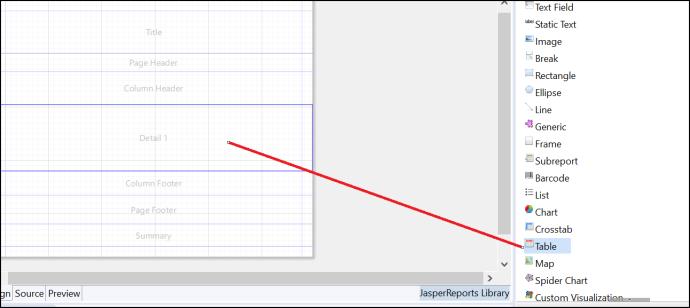
5. In the Design panel, from the Basic Elements palette, drag a Table element to the details area of the Design edotor.
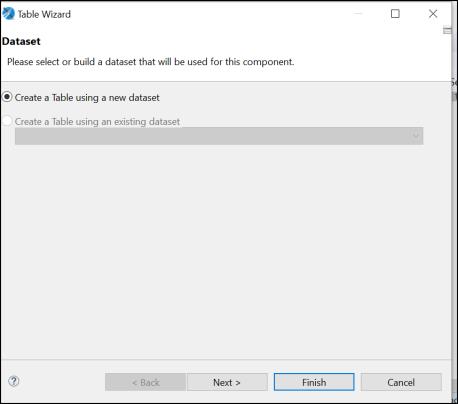
6. In the Table Wizard select Create a Table using a new dataset option and click Next. You can define multiple dataset or multiple Report Templates for the same Jasper design. Each time you create new dataset, the previously created dataset in Jasper Design appear as additional options in the wizard.
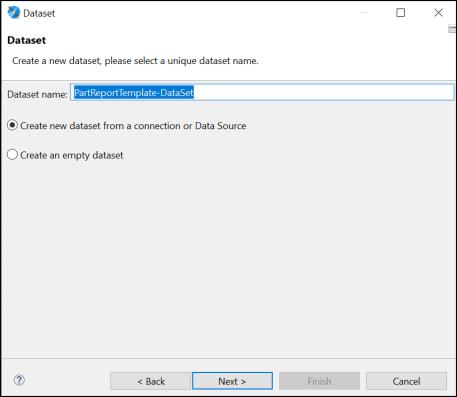
7. On the Dataset wizard, you have option to create dataset from given source, Select Create new dataset from a connection or Data Source and specify the dataset name. Click Next.
8. On the Dataset Wizard, click New to create an adapter based on required Report Template. Alternatively, select an existing adapter based on Report Template.
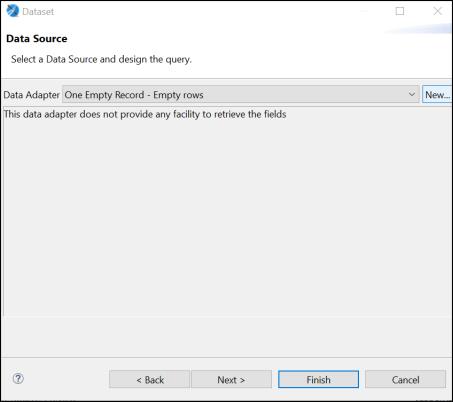
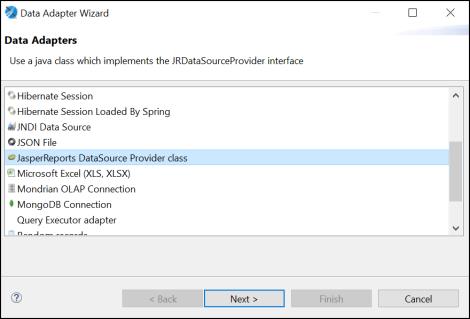
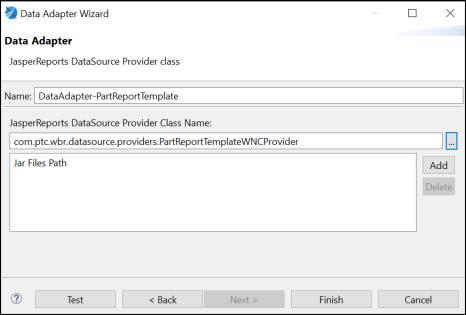
9. On the Data Adapter Wizard, click below highlighted option and click Next.
10. Provide a name for the adapter and click Finish.
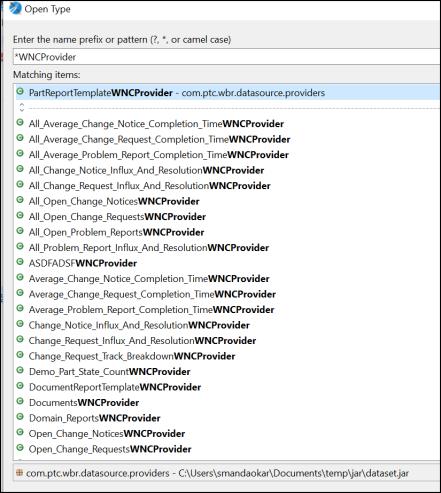
11. On the Open Type Wizard, select a desired Report Template provider class as shown below. PartReportTemplate is available, select it and click OK.
12. On the Data Adapter Wizard, verify the class name and adapter name and click Finish.
13. Now on the Data Source Wizard, you should see the newly created adapter as the default selection. Click Next.
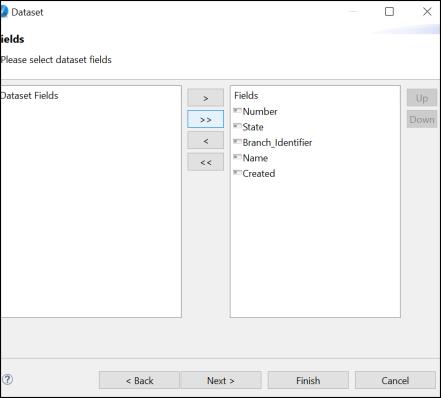
14. On the Fields Wizard, select and move all or relevant fields of Report Template from Dataset Fields to Fields section, and click Finish.
15. Navigate to the > > of the report project. Create columns in the table so that you can place all the created fields into each column as shown below.
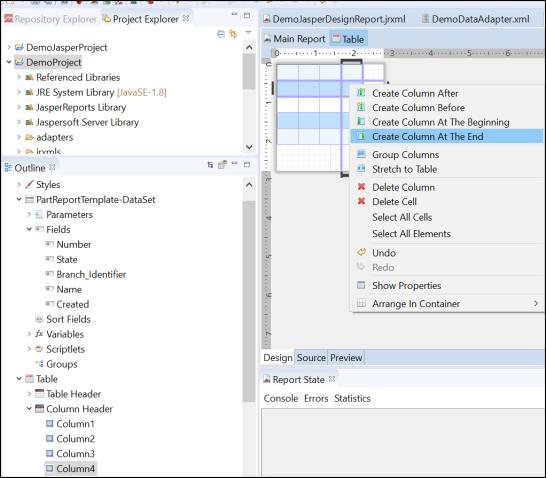
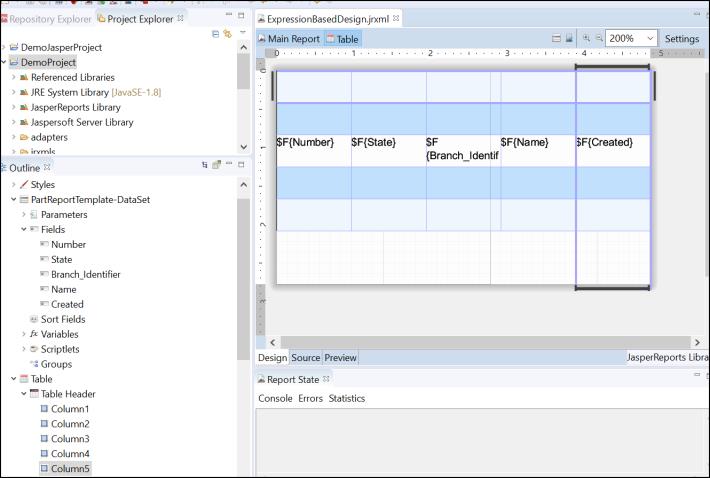
16. Once the columns are created, you can drag the Fields to each column of the Table.
17. To add a field, click > > > . Select Use a JRDatasource expression and click the edit icon. On the Expression Editor Wizard, edit the ReportTemplateJRDataSource expression. Provide the constructor definition on it with Report Template name as first mandatory parameter and container-path as secondary parameter, which refers to container path for example wt.inf.container.OrgContainer=Demo Organization/wt.pdmlink.PDMLinkProduct=GOLF_CART, if container-path is not specified the default Windchill container-path will be used to locate the given Report Template.

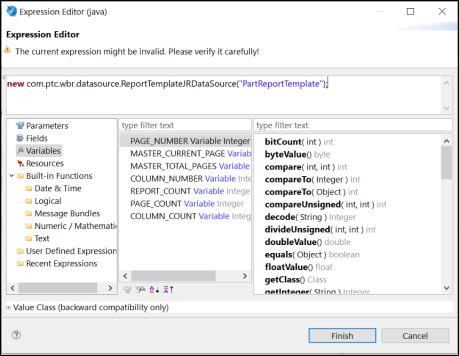
18. In the Expression Editor Wizard, edit the ReportTemplateJRDataSource expression to specify the name of report template, name of container, and type of container. For example: (“PartReportTemplate”, “Site”, “Site”). Click Finish.
19. Verify that the dataset properties are updated to include the modified expression .
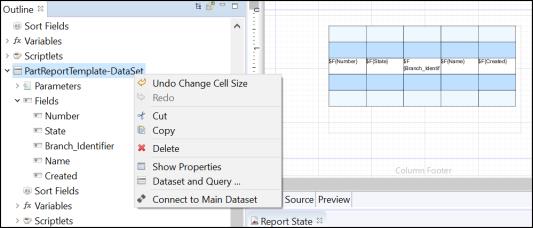
20. Right-click on dataset and select Dataset and Query .
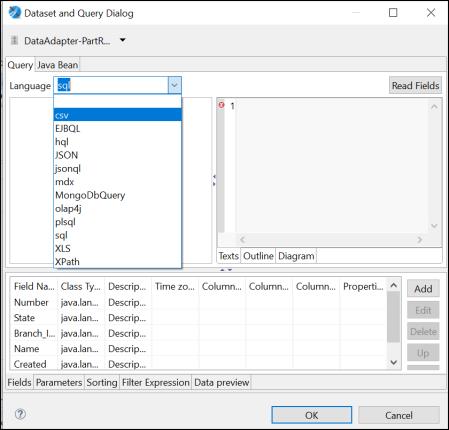
Browse to Dataset and Query Dialog, replace the Language from sql to csv. Click OK.
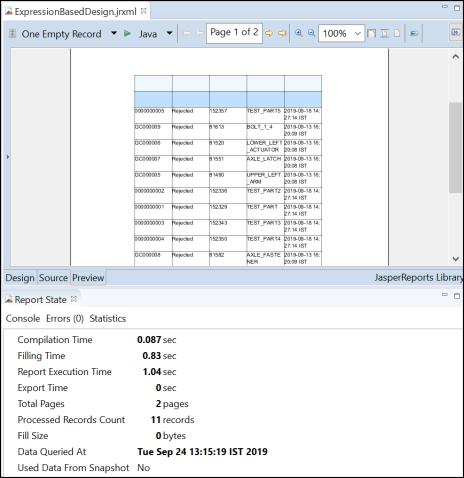
21. On the Jasper Studio window, click Save. To view a preview of the report, click Preview.
Prog-Example:
Report Name | JRXML location | Loader location | Input JSP location | Required Reporttemplate QML location | Criteriapage location |
|---|---|---|---|---|---|
DemoReportObject | <$WT_HOME> /prog_examples/JasperIntegration /JasperReports/Sample/DemoReportObject.jrxml | <$WT_HOME> /prog_examples/JasperIntegration /loadFiles/reports/jasper/loadDemoReportObject.xml | <$WT_HOME>/prog_examples/JasperIntegration/netmarkets/jsp/report/jasper/demoInputPage.jsp | <$WT_HOME>/prog_examples/JasperIntegration/loadFiles/reports/jasper/DocumentReportTemplate.qml <$WT_HOME>/prog_examples/JasperIntegration/loadFiles/reports/jasper/PartReportTemplate.qml <$WT_HOME>/prog_examples/JasperIntegration/loadFiles/reports/jasper/PartStateCount.qml |