File Server Remote Site Pre-Installation Steps
A remote file site is meant to provide Windchill users with local access to content data in replicated vaults.
Before you install a File Server remote site, you must complete the following pre-installation steps:
1. Make sure you have used PSI to install a master site and have enabled the master site to use the File Server remote site.
2. Generate a security key.
3. Use the File Server Management utility to download the software and key.
|
|
While installing file server, ensure that the supported version of Java is installed and a reference to the existing Java installation is available on the PSI.
|
The following sections provide detailed information for each step.
Critical Patch Sets
CPS updates for a remote File Server are required when CPS’s are applied to the master site. The updates are delivered by a file named CcsDsu.zip that contains all the necessary updates for a CPS. If you are making a third party update as a result of a CPS update you must manually download the file server installer bundle zip, extract it and launch PSI in it to complete the update.
If the autoManageCCS property in the wt.properties file is set to true, this ZIP file is automatically downloaded to the following location on the remote File server when the configuration is broadcast: <Windchill>/CCSTools/update.
If the autoManageCCS property is set to false, you must manually transfer this file to the remote file server. The ZIP file resides in the following location on the master site <Windchill>/CCSTools/update.
After the ZIP file is downloaded to the appropriate location, you must restart Windchill on the File Server to apply the update.
Enabling the Master Site to Use the File Server
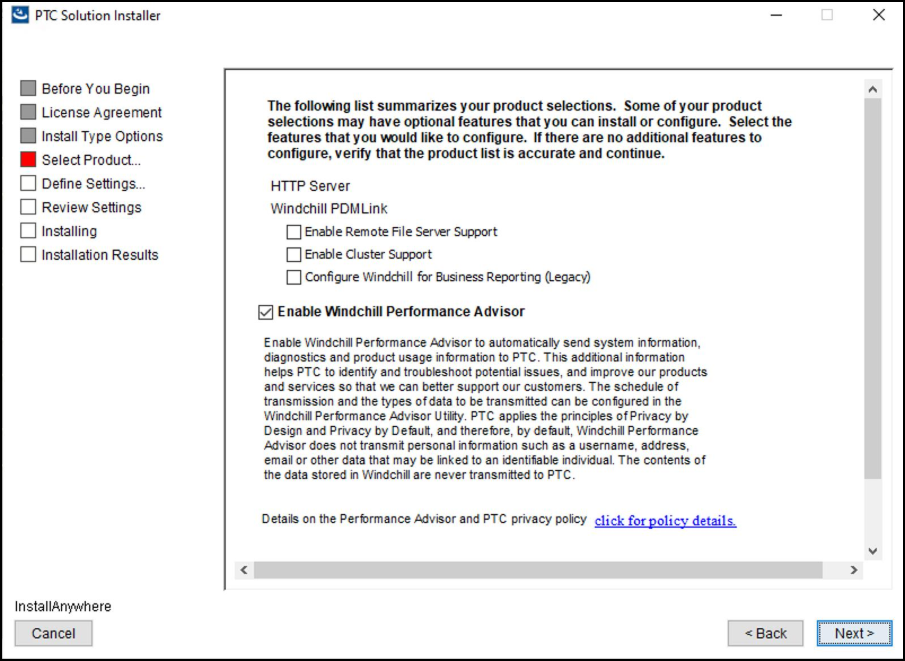
Use Advanced PSI for installation and configuration on the master site. On the Select Product Features window, make sure you select the Enable Remote File Server Support checkbox:
You can select the Enable Remote File Server Support checkbox in all of the following product bases:
• Windchill PDMLink
• Windchill ProjectLink
• Windchill CAPA (not available if installing as a standalone product)
• Windchill Nonconformance (not available if installing as a standalone product)
• Windchill Customer Experience Management (not available if installing as a standalone product)
• Windchill Integrations for Embedded Software
• Integral Windchill PDMLink and Windchill ProjectLink
• Integral Windchill ProjectLink and Arbortext Content Manager
• Arbortext Content Manager
| You must complete this step during the master server installation. Otherwise, you will need to perform manual steps to set it up later. |
Generating the Security Key
Before you install the File Server remote site, you must generate security keys (public and private), export the public key and copy it to the remote site file system, and make it known to the remote site.
To generate security keys:
1. On the master site, select > > > .
The Site Management window opens.
2. Select the master site.
| Selecting the master site activates the Update Keys button. |
3. If there is an existing Key Generation Date for the keys displayed in the table, you can accept the value and do nothing, or click Update Keys to initiate the creation of the public and private keys. (Generating the keys requires several seconds.)
4. When the keys are created, select the master site again and then click Export Key.
5. Provide a name for the key, navigate to a storage location for the key, and save it as a file. The key must have the extension PUBKEY or KEY (for example, site1.pubkey).
Downloading the Software and Key Using the File Server Management Utility
1. Create a folder for your software and key downloads.
2. From a remote machine you want to use as a File Server, click or enter the master site URL.
A Windchill product opens (See the various Windchill products listed in Step 1 in this section.)
3. From
Site 
,
Libraries 
,
Products 
, , select > > .
| For Organizations and Projects the File Server Management link is available under Utilities. |
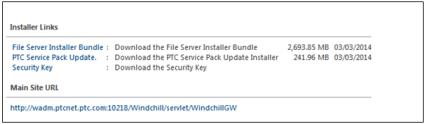
The File Server Management page opens with the list of Installer Links.
4. Click each installer link and download the files into the folder you created earlier in this procedure.
5. Extract CcsInstallerBundle.zip ZIP file.